Task Templates
Users can create multiple Task Templates in the ShopEdge system. You can only have one Default template that will be assigned when a new Planned Job is created. Before using the APQP system, Project Phases and Task Categories must be defined, and a Task Template created. In the APQP system, you can create Phases, and Tasks are grouped into Categories, like Sales, and Engineering. You can define as many Phases, Categories and Tasks as needed.
The Task Template is used to initialize the Tasks for a new Planned Job. When launching a new Planned Job, the Tasks in the default template will be created.
Adding a Task Template
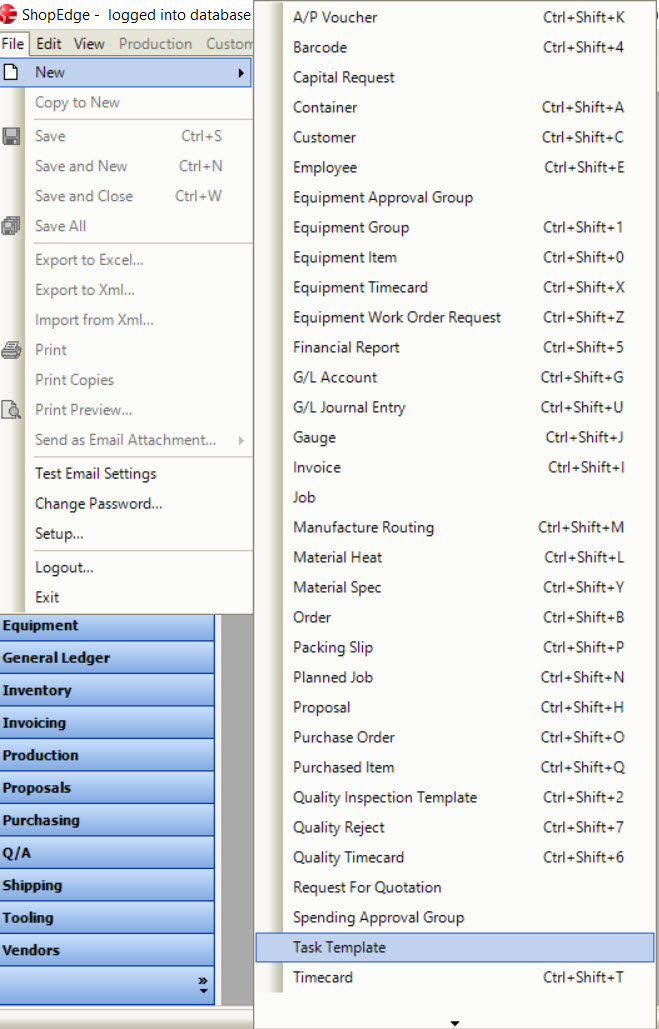
There are two ways to add a new Task Template. The first way is to navigate to File > New > Task Template.
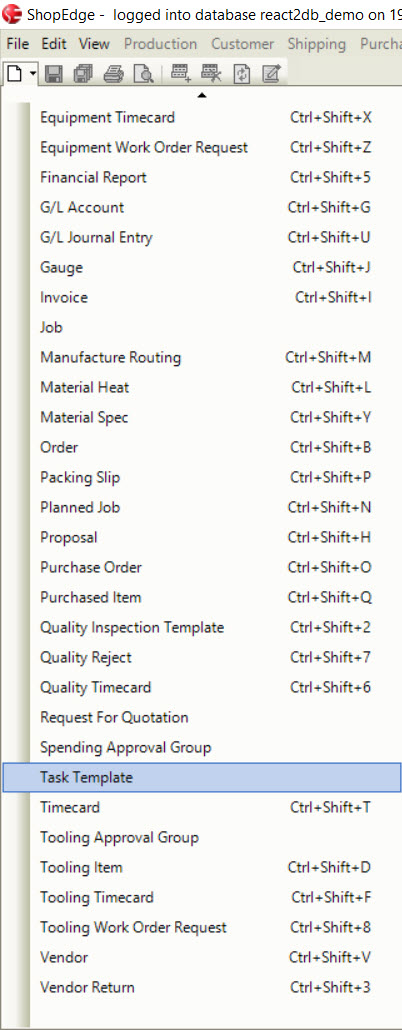
The second way is to navigate to the  button and select Task Template.
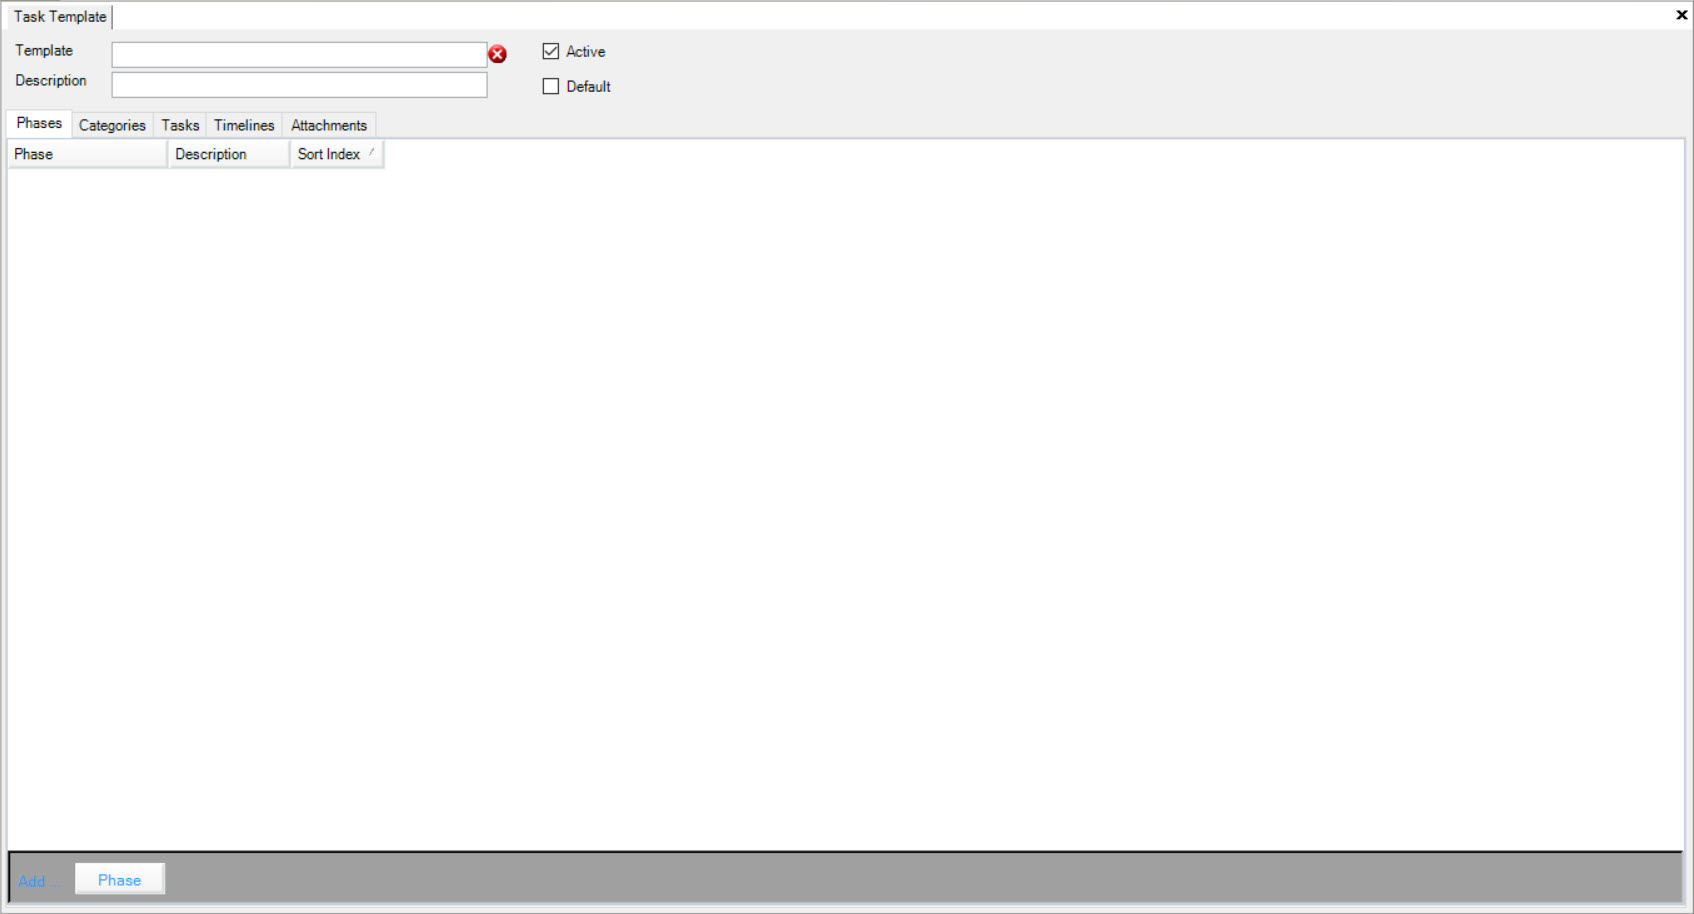
These two ways will open the new Task Template screen.
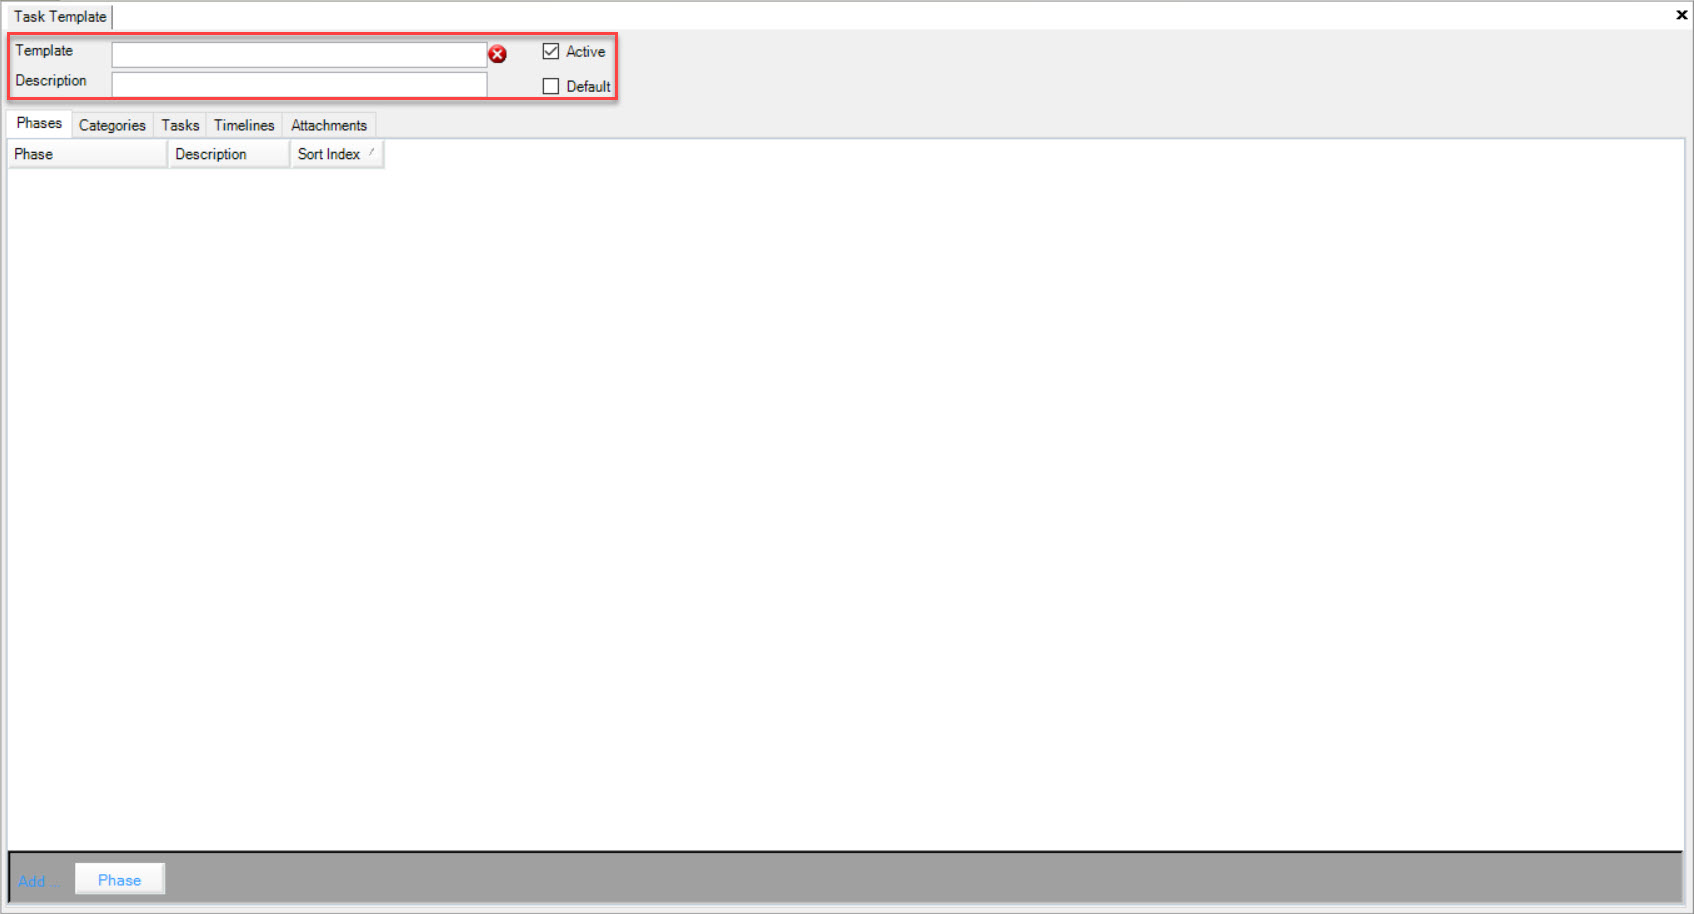
Fill in the Template Name, Description, and select or de-select whether you would like to have it Active or as the Default.
Make sure to save your changes.
You will now be able to view your new Task Template in the Task Template screen by navigating to the  tab and clicking on the
  icon.
icon.
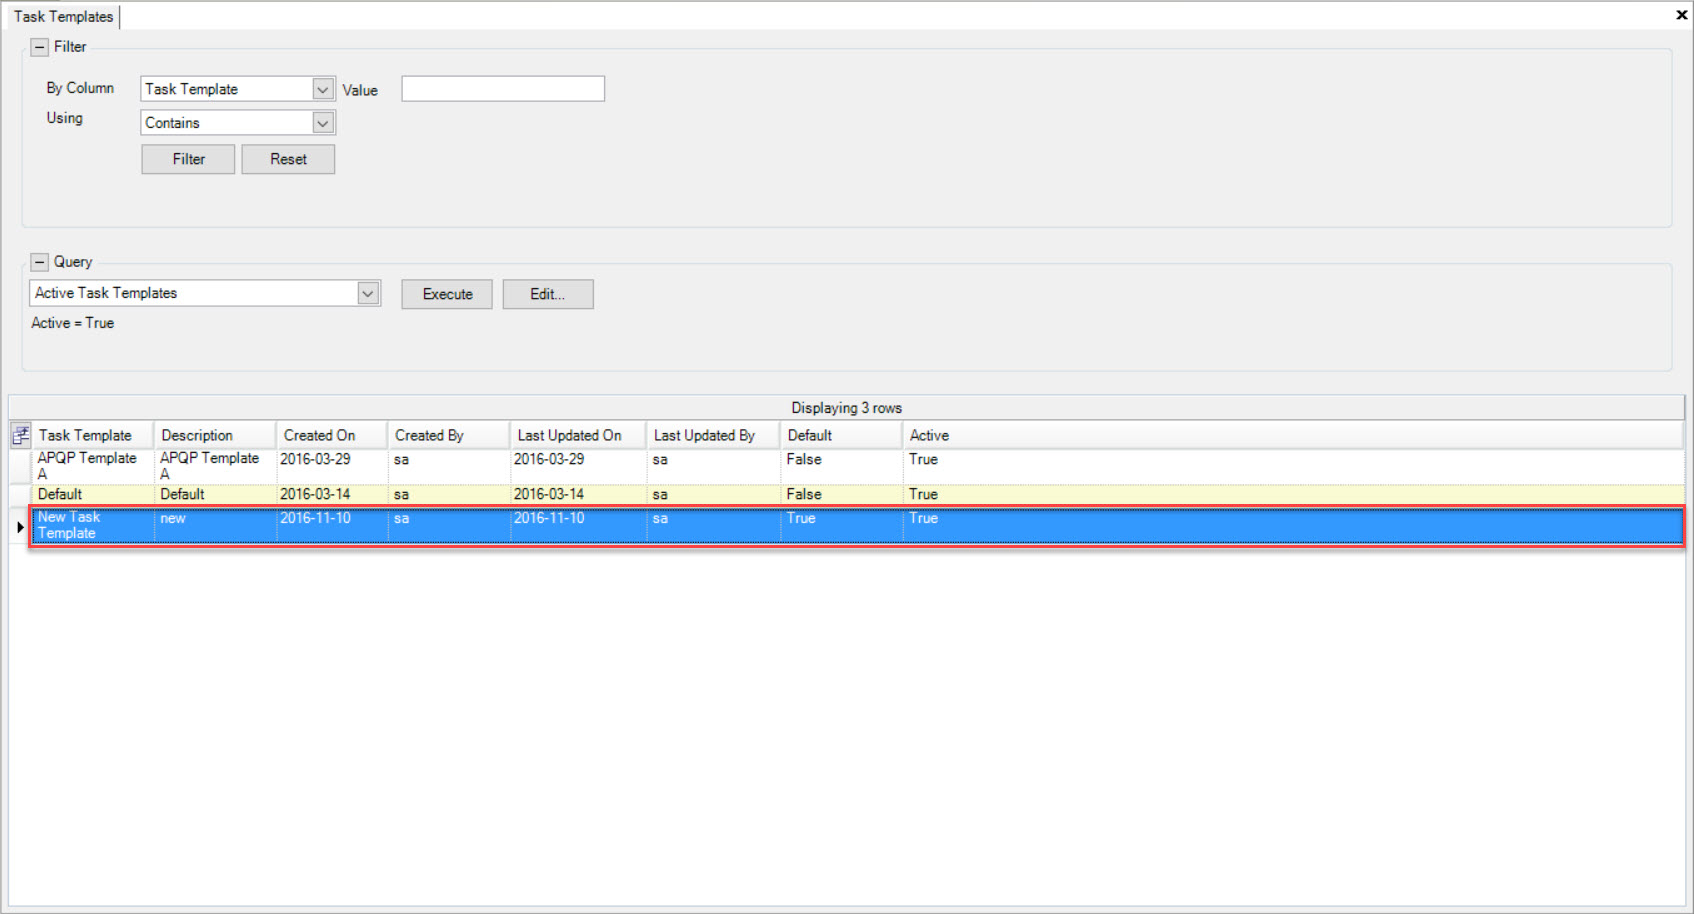
Adding Project Phases
When launching a new Planned Job, you can add start and end dates to a Phase in order to track the progress.
To add Project Phases, navigate to the  tab and click on the
  icon.
The system will display the Task Template screen.
Locate and double-click on the Task Template from the Task Template screen where you wish to add a Project Phase to.
The Task Template Detail screen will be displayed. Make sure to select the Phases tab.
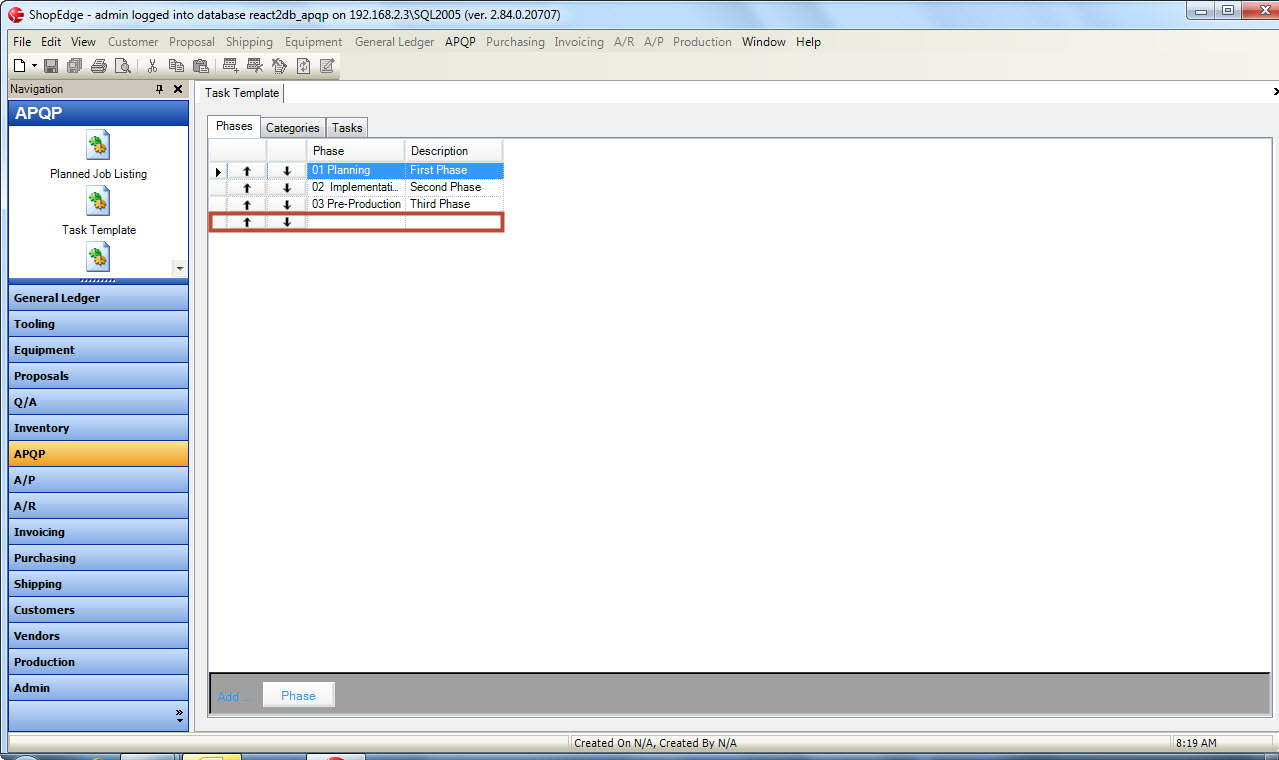
Click on the  button located at the bottom of the screen.
Fill in the Phase and Description, then click on the
  icon to save your changes.
Deleting a Project Phase
To delete a Project Phase from a Task Template, navigate to the  tab and click on the
  icon.
The system will display the Task Templates screen. Locate and double-click on the Task Template you wish to delete a Project Phase from.
The Task Template Detail screen will be displayed. Make sure to click on the Phases tab.
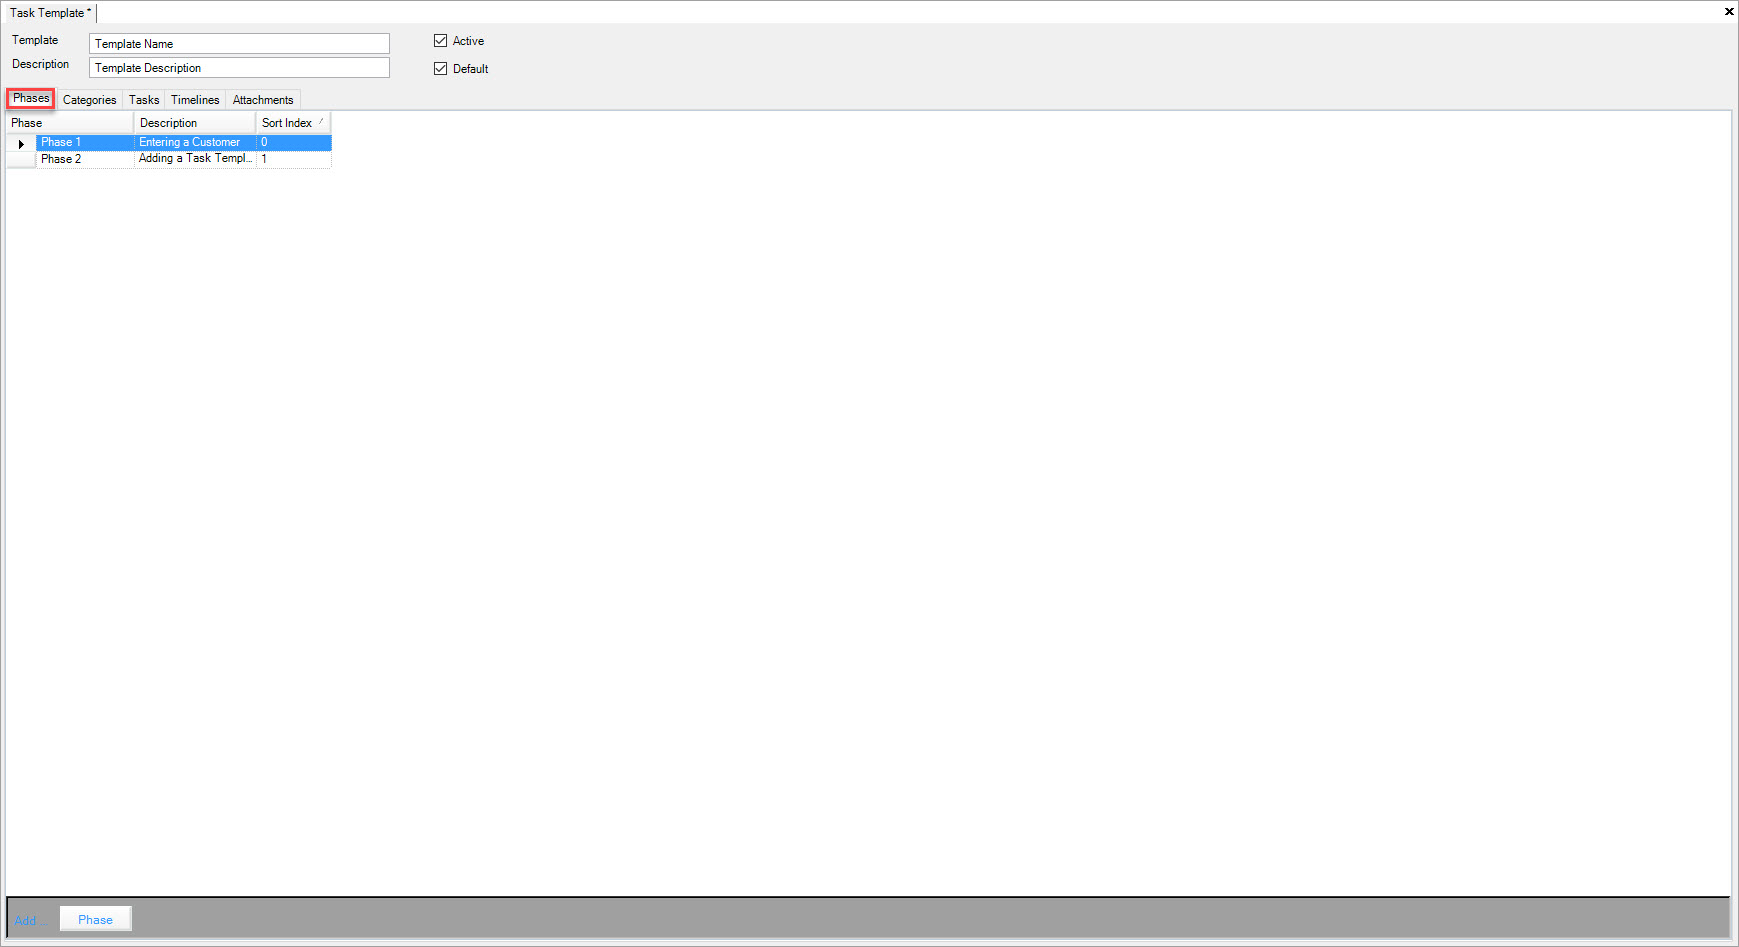
Select the Phase you wish to delete and highlight the appropriate row. Use your Delete key and when the system prompts you, select Yes.
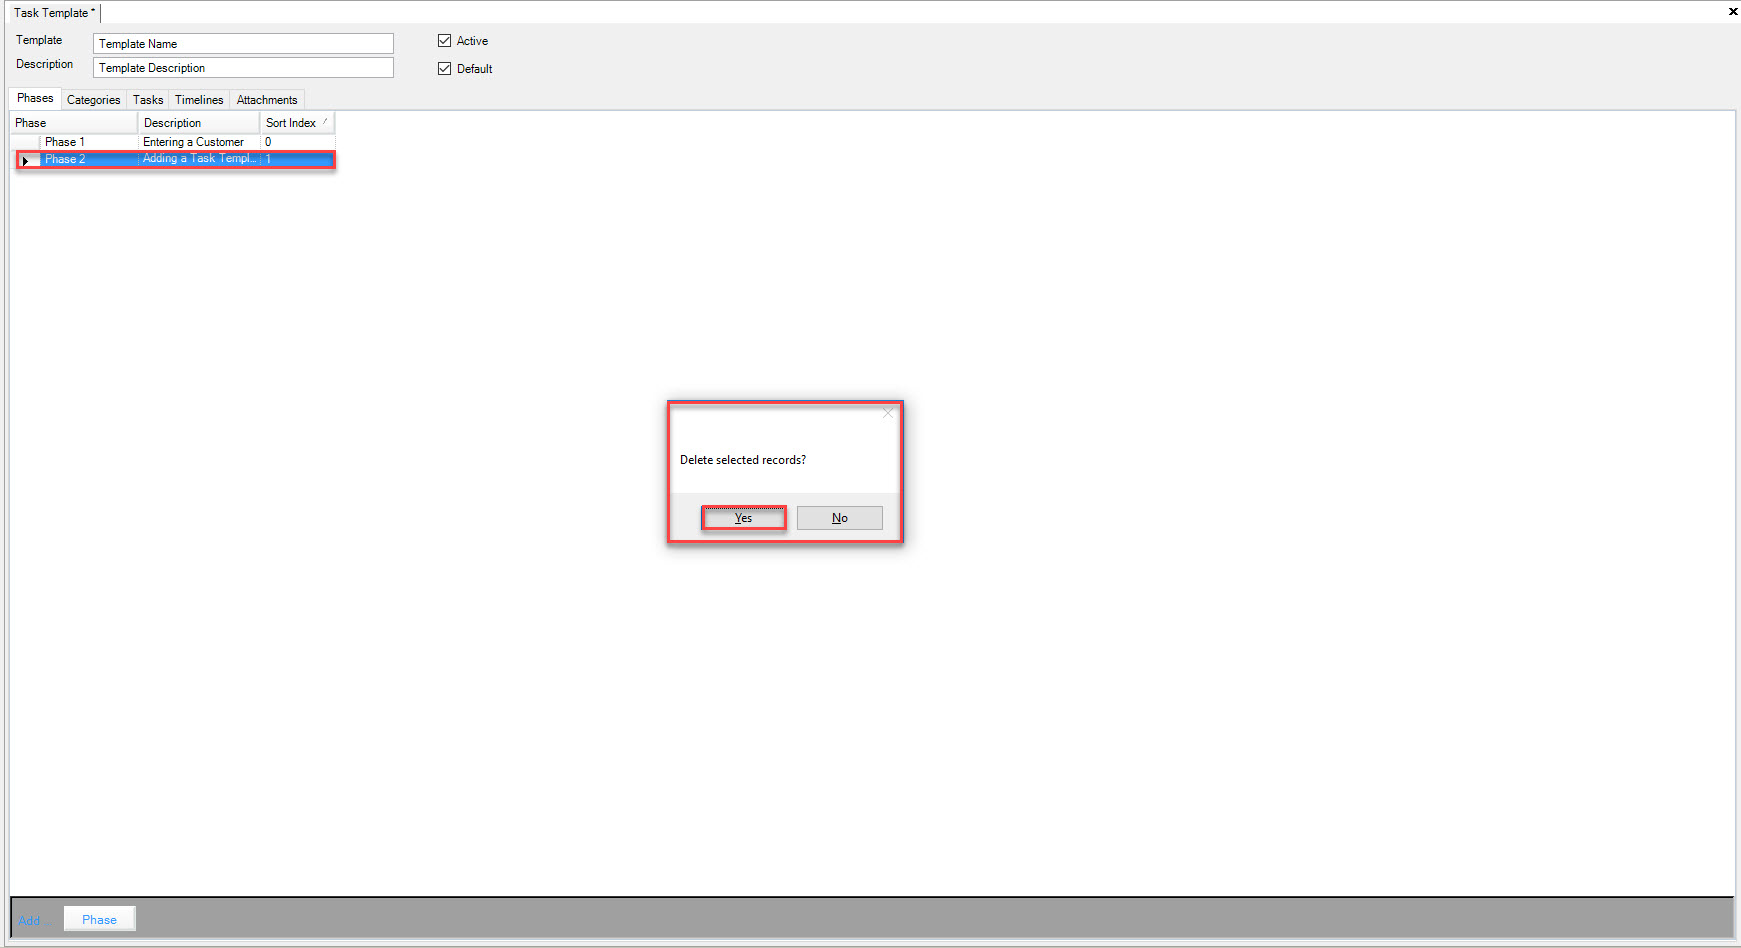
Make sure to save your changes before exiting the screen.
Adding Categories
To add Task Categories, navigate to the  tab and click on the
  icon.
icon.
The Task Template screen wil be displayed. Locate and double-click on the Task Template you wish to add a Category to.
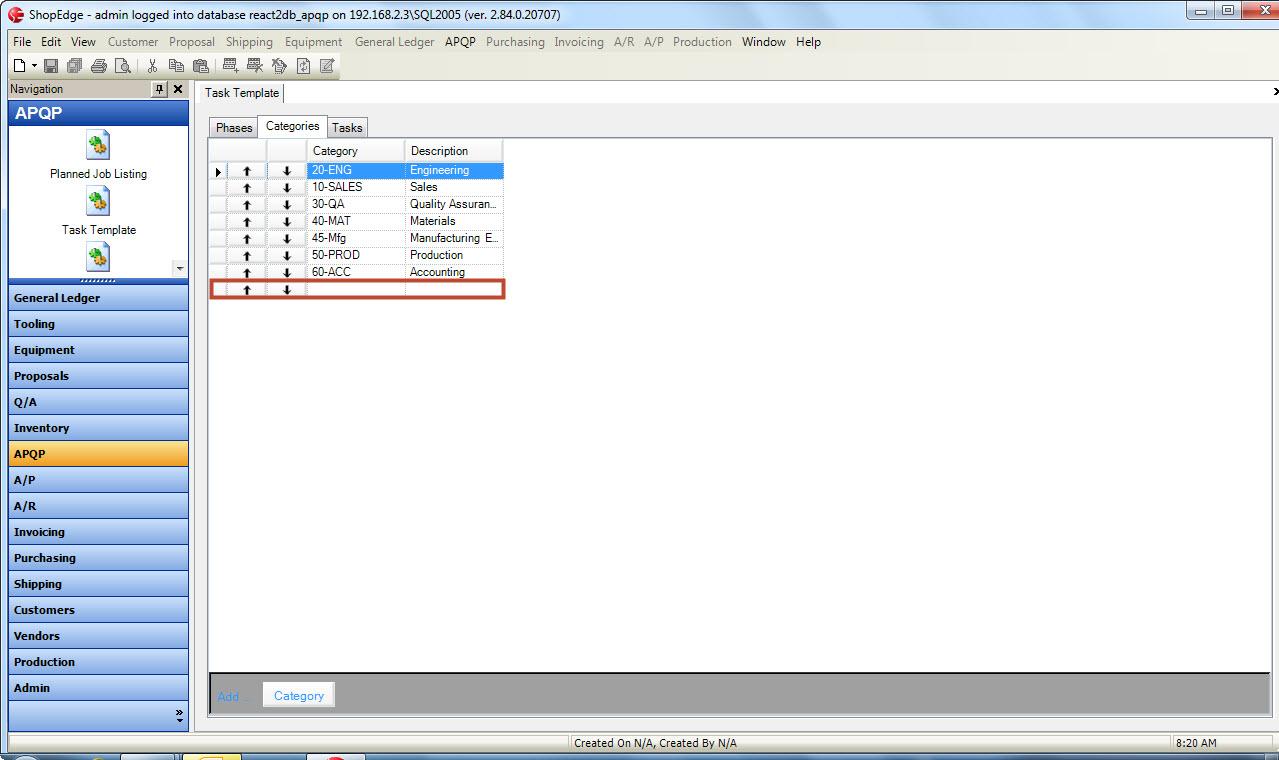
Once this is done, the system will display the Task Template Detail screen. Make sure to select the Categories tab.
Click on the  button located at the bottom of the screen.
Fill in the Category and Description, and then click the
  icon to save your changes.
Deleting a Category
To delete a Category from a Task Template, navigate to the  tab and click on the
  icon.
The system will display the Task Templates screen. Locate and double-click on the Task Template you wish to delete a Category from.
The Task Template Detail screen will be displayed. Make sure to click on the Categories tab.
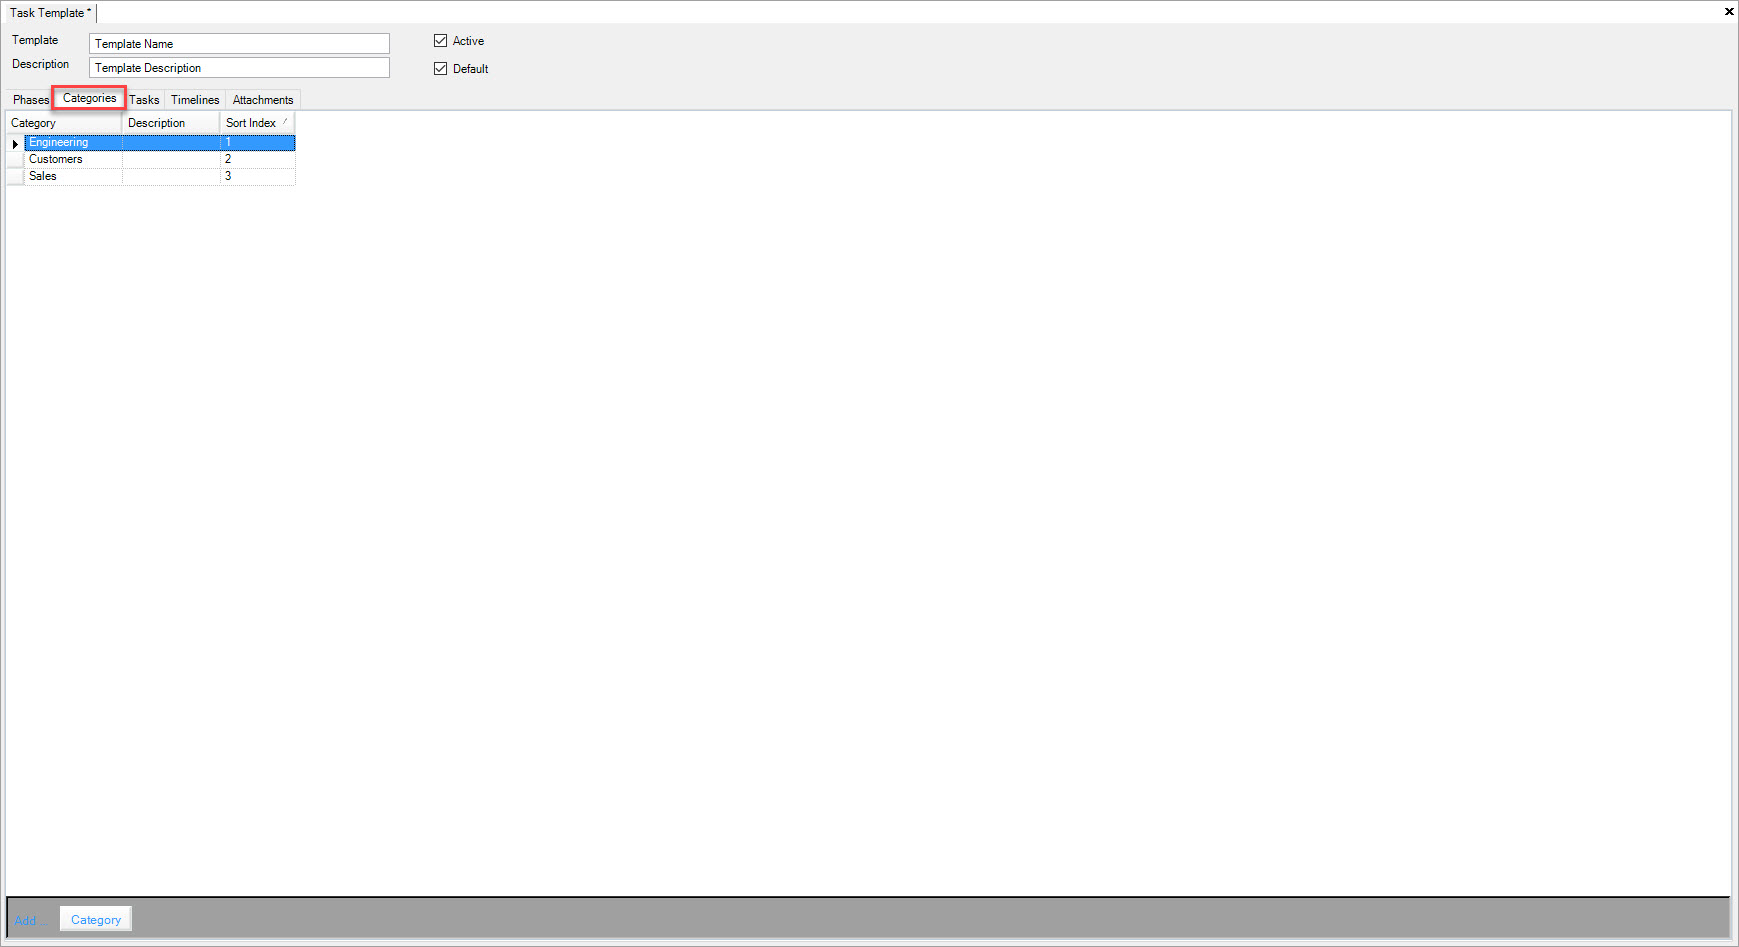
Select the Category you wish to delete and highlight the appropriate row. Use your Delete key and when the system prompts you, select Yes.
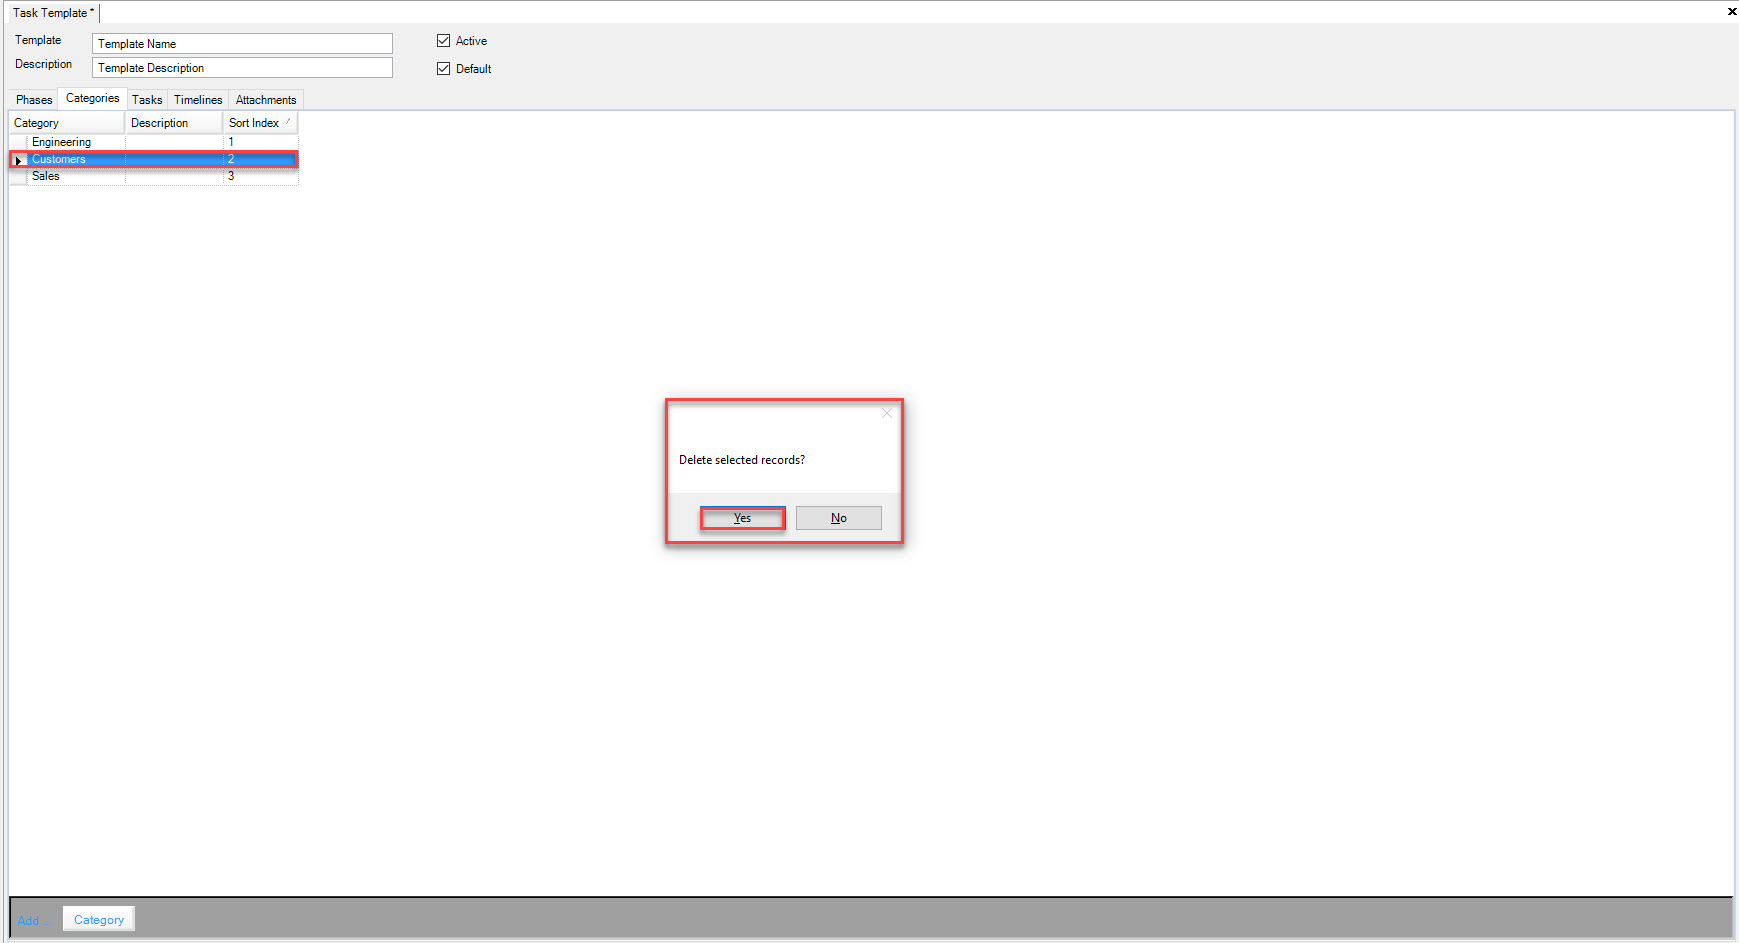
Make sure to save your changes before exiting the screen.
Adding a New Task
There are two different places to add a Task in the system. You can add a Task directly to a Task Template, or by adding one to the Planned Job screen.
To a Task Template
To add a Task to a Task Template, navigate to the  tab and click on the
  icon.
You must double-click on the Task Template from the Task Template screen where you wish to add a new Task to.
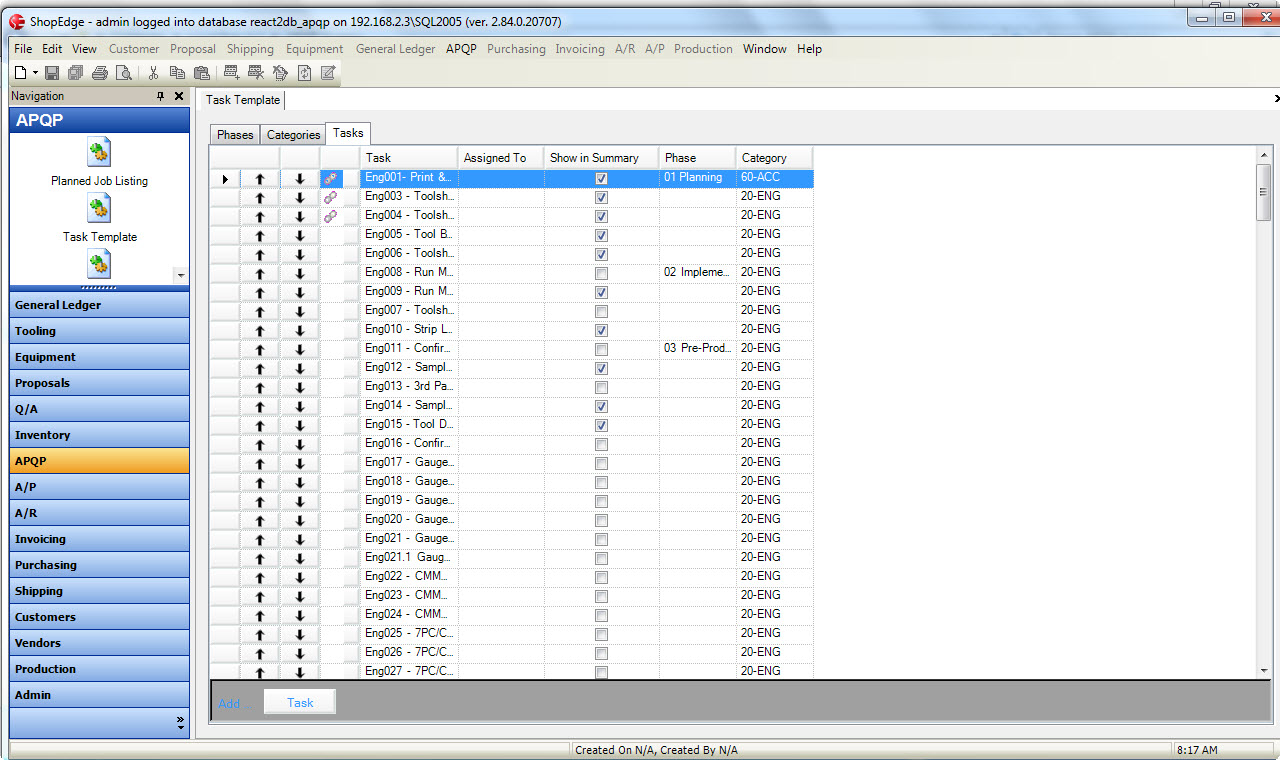
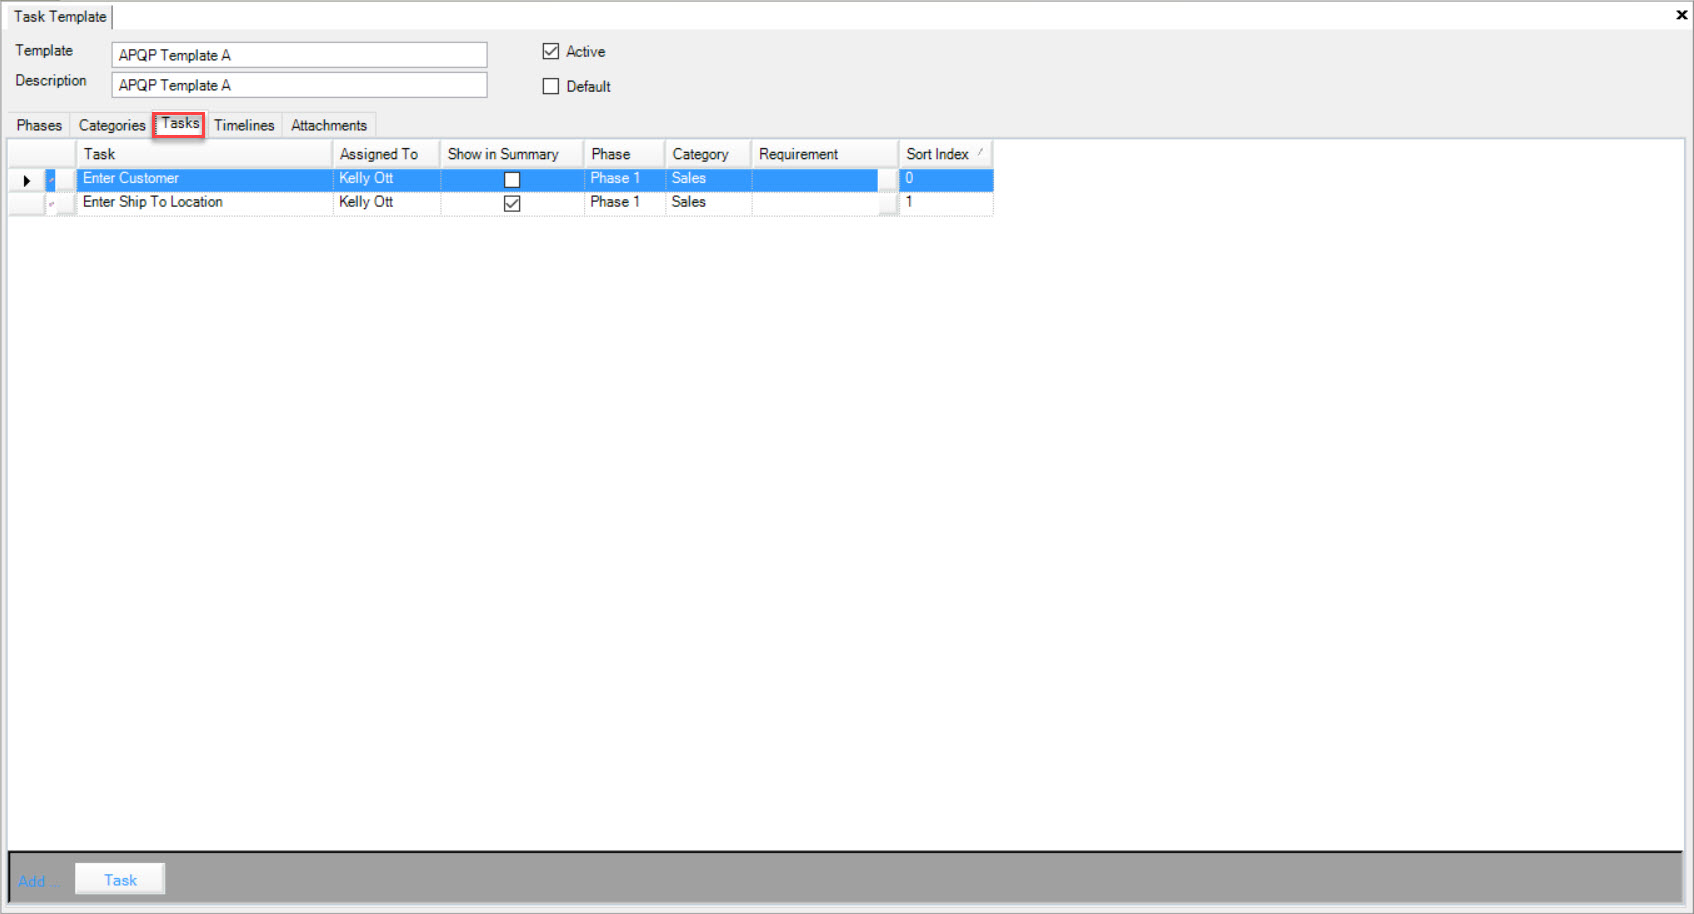
Once this is done, the system will display the Task Template Detail screen. Make sure to select the Tasks tab.
Click on the  button located at the bottom of the screen.
Fill in the Task Name and select a Category by using the drop-down menues in the appropriate columns.
You can assign the Task to a user, or leave it blank. You can also select a Phase, but it is not required.
If you wish the Task to show on the Sumnmary tab of the Planned Job screen, select the Show in Summary option.
Click the  icon to save your changes.
To a Planned Job
To add a Task in the Planned Job screen, navigate to the  tab and click on the
 ![]() icon.
Locate the Item you wish to add the Task to and double-click on the appropriate row to open the Planned Job Detail screen.
icon.
Locate the Item you wish to add the Task to and double-click on the appropriate row to open the Planned Job Detail screen.
Under the Task panel located at the bottom of the screen, click on the Tasks tab. Right-click the mouse on the Category or Task to display the menu and select New Task.
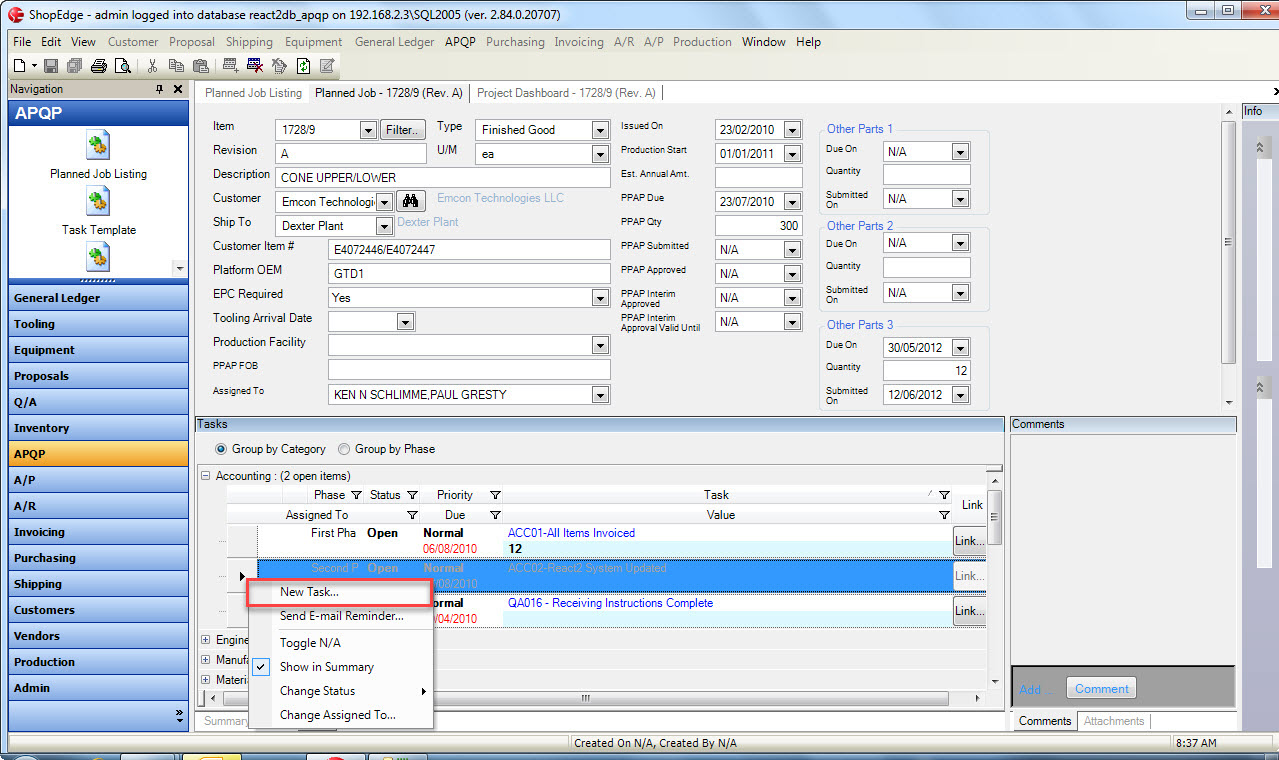
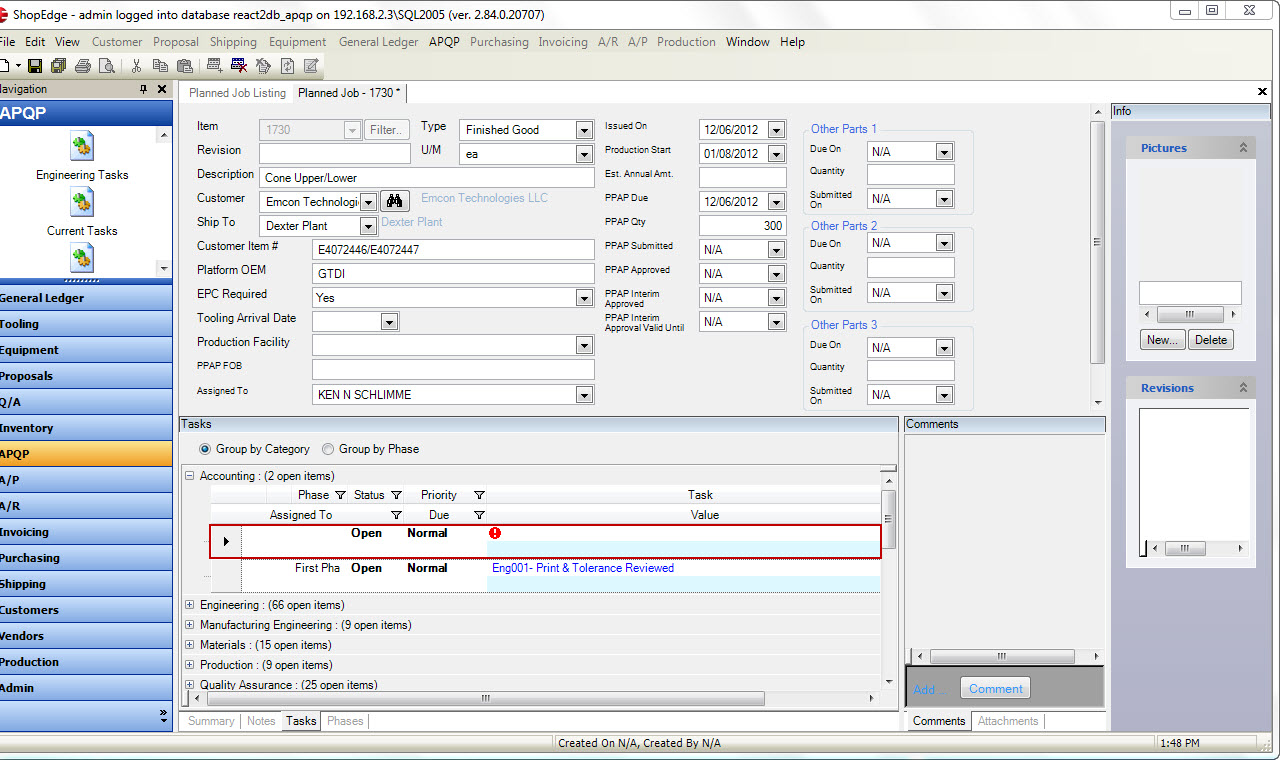
Fill in the Task Name and select a Phase and Category by clicking on the drop-down menus in the appropriate columns.
You can assign the Task to a user, or leave it blank. To set the default Due Date for the Task, click on the drop-down menu in the Due Date column.
You can make the Task due relative to the issue date, or PPAP date. Enter in the number of days.
Click the  icon to save your changes.
Deleting a Task from a Task Template
To delete a Task from a Task Template, naviagte to the  tab and click on the
  icon.
The Task Template screen will be displayed. You must double-click on the Task Template you wish to delete a Task from. This will open the Task Template Detail screen.
Make sure to click on the Tasks tab.
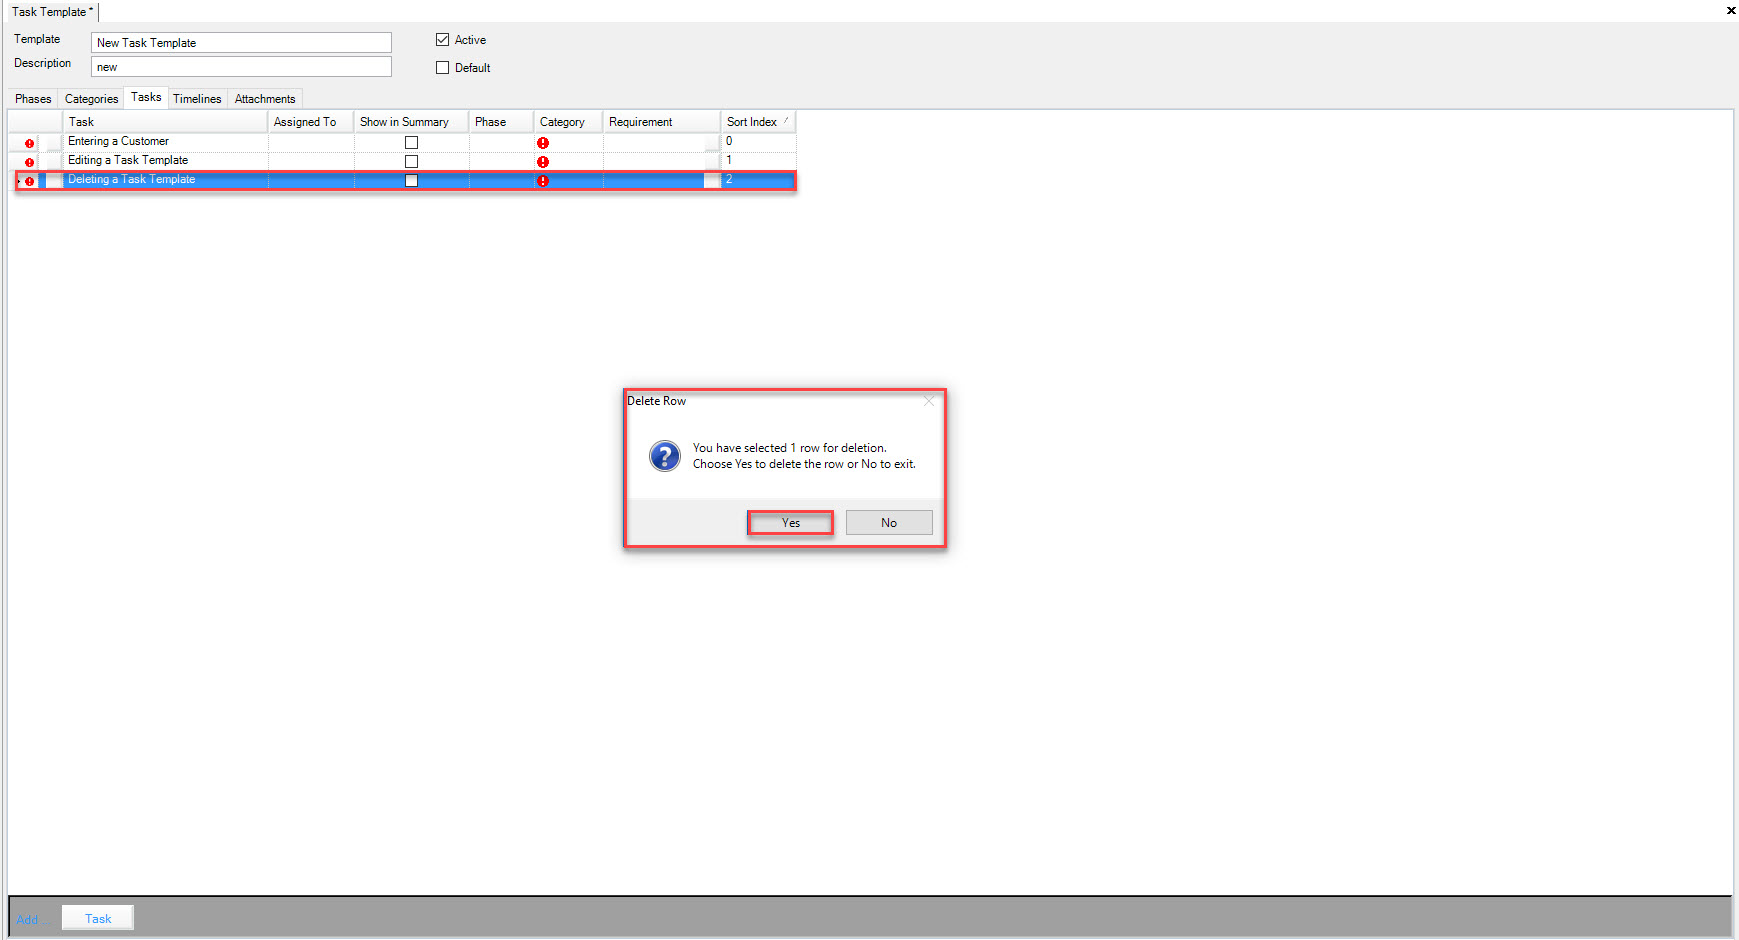
Select the Task you wish to delete by highlighting the appropriate row. Use your Delete key and when the system prompts you, select Yes.
Make sure to save your changes before exiting the screen.
Deleting a Task from a Planned Job
To delete a Task from a Planned Job, navigate to the  tab and click on the
 ![]() icon.
Locate the Item you wish to delete a Task from and double-click on the appropriate row to open the Planned Job Detail screen.
icon.
Locate the Item you wish to delete a Task from and double-click on the appropriate row to open the Planned Job Detail screen.
Make sure the Tasks tab is selected at the bottom of the screen. Click on the + button and select the Task you wish to delete by highlighting the appropriate row. Use your Delete key and when the system prompts you, select Yes.
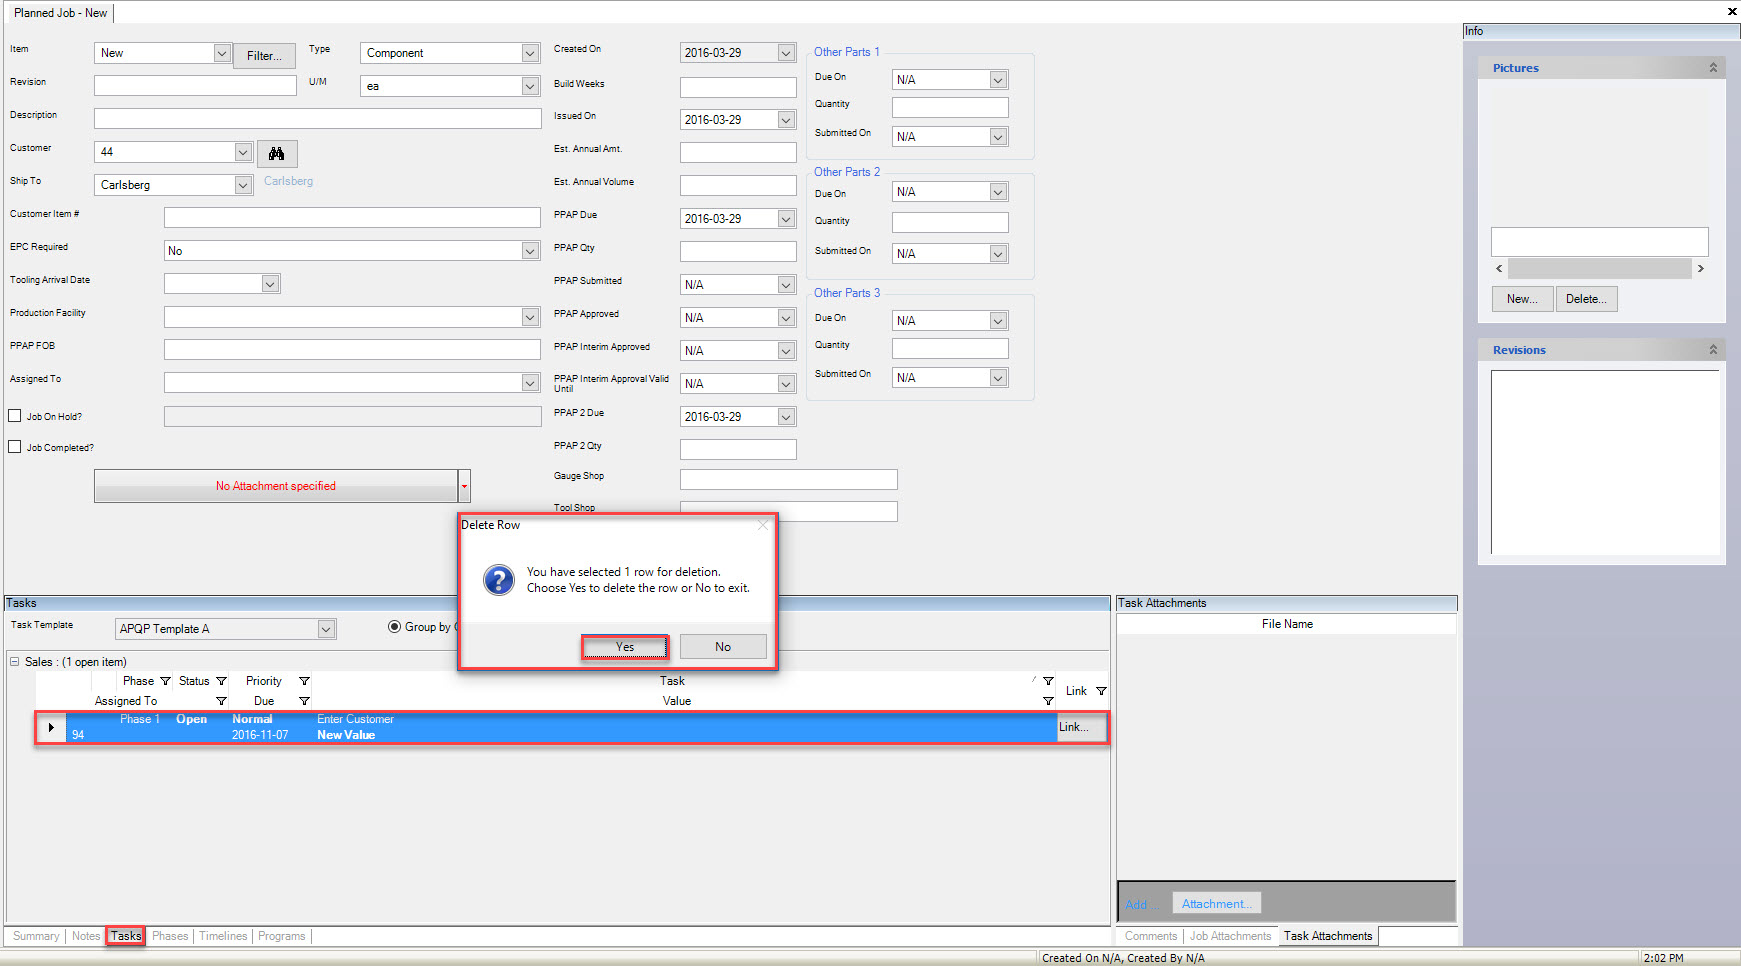
Make sure to save your changes before exiting the screen.
Linking Tasks
You have the ability to link Tasks to each other under the Task Templates tab. The purpose of this is to link Tasks, so that Tasks are connected and therefore must be completed together.
To link Tasks, navigate to the  tab and click on the
  icon. The Task Template screen will be displayed.
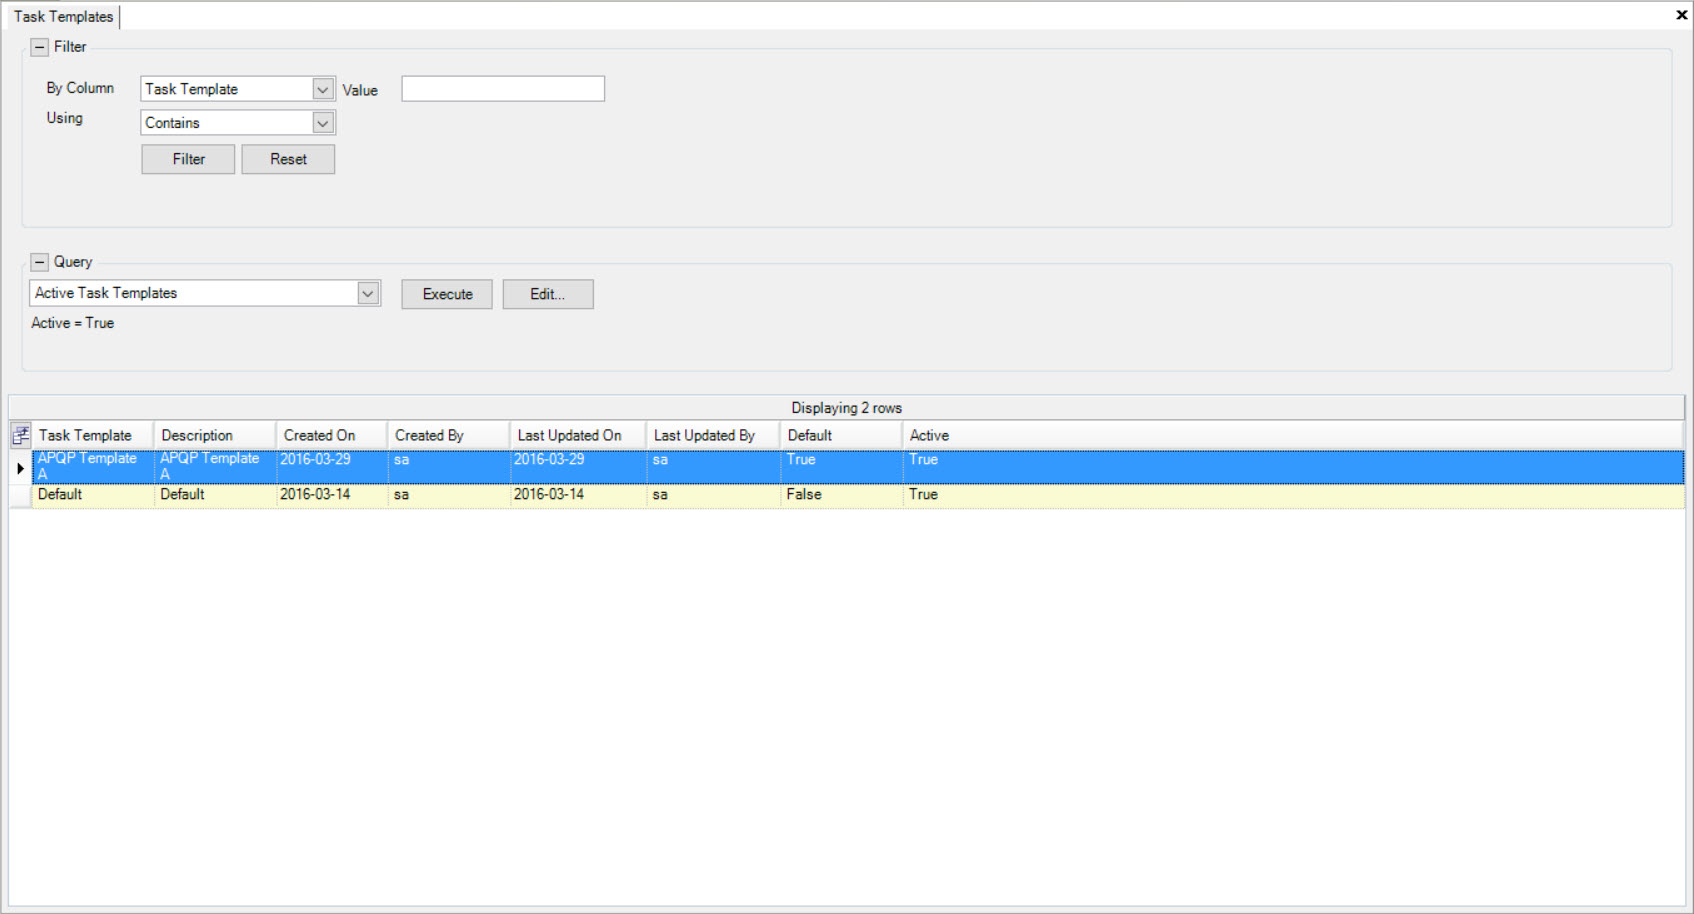
Locate and double-click on the Task Template you wish to link Tasks to. The Task Template Detail screen will be displayed. Make sure to click on the Tasks tab.
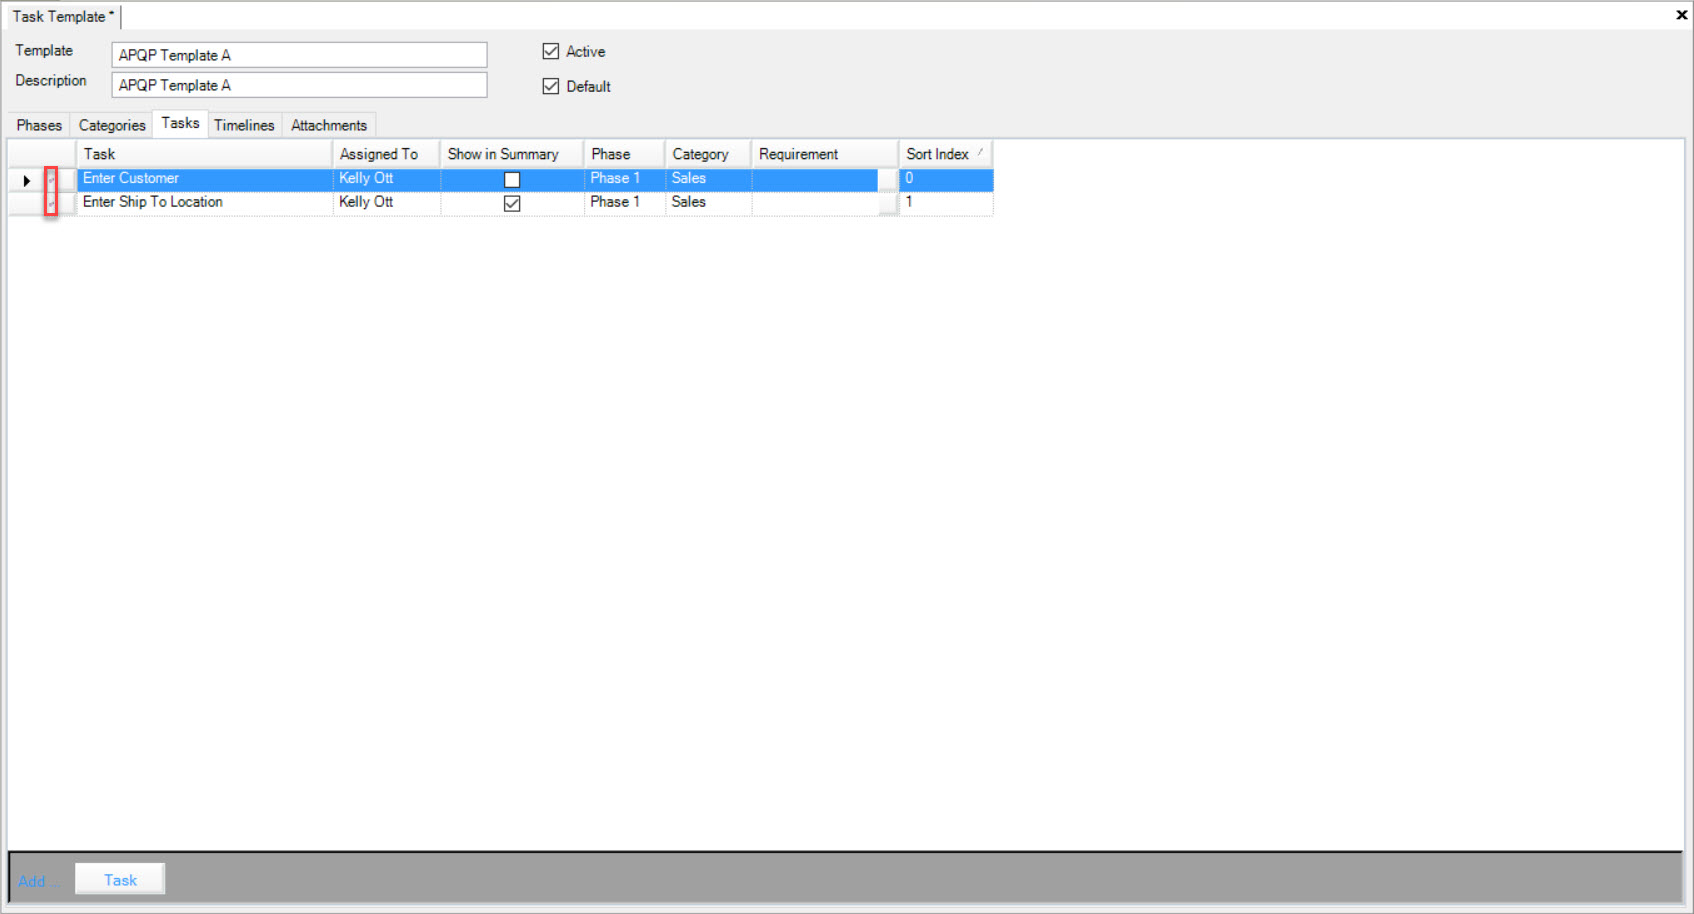
Under the Tasks tab, find the Task you wish to link one or multiple Tasks to and click on the square button to the left of the Task. This will bring up the Linked Tasks window.
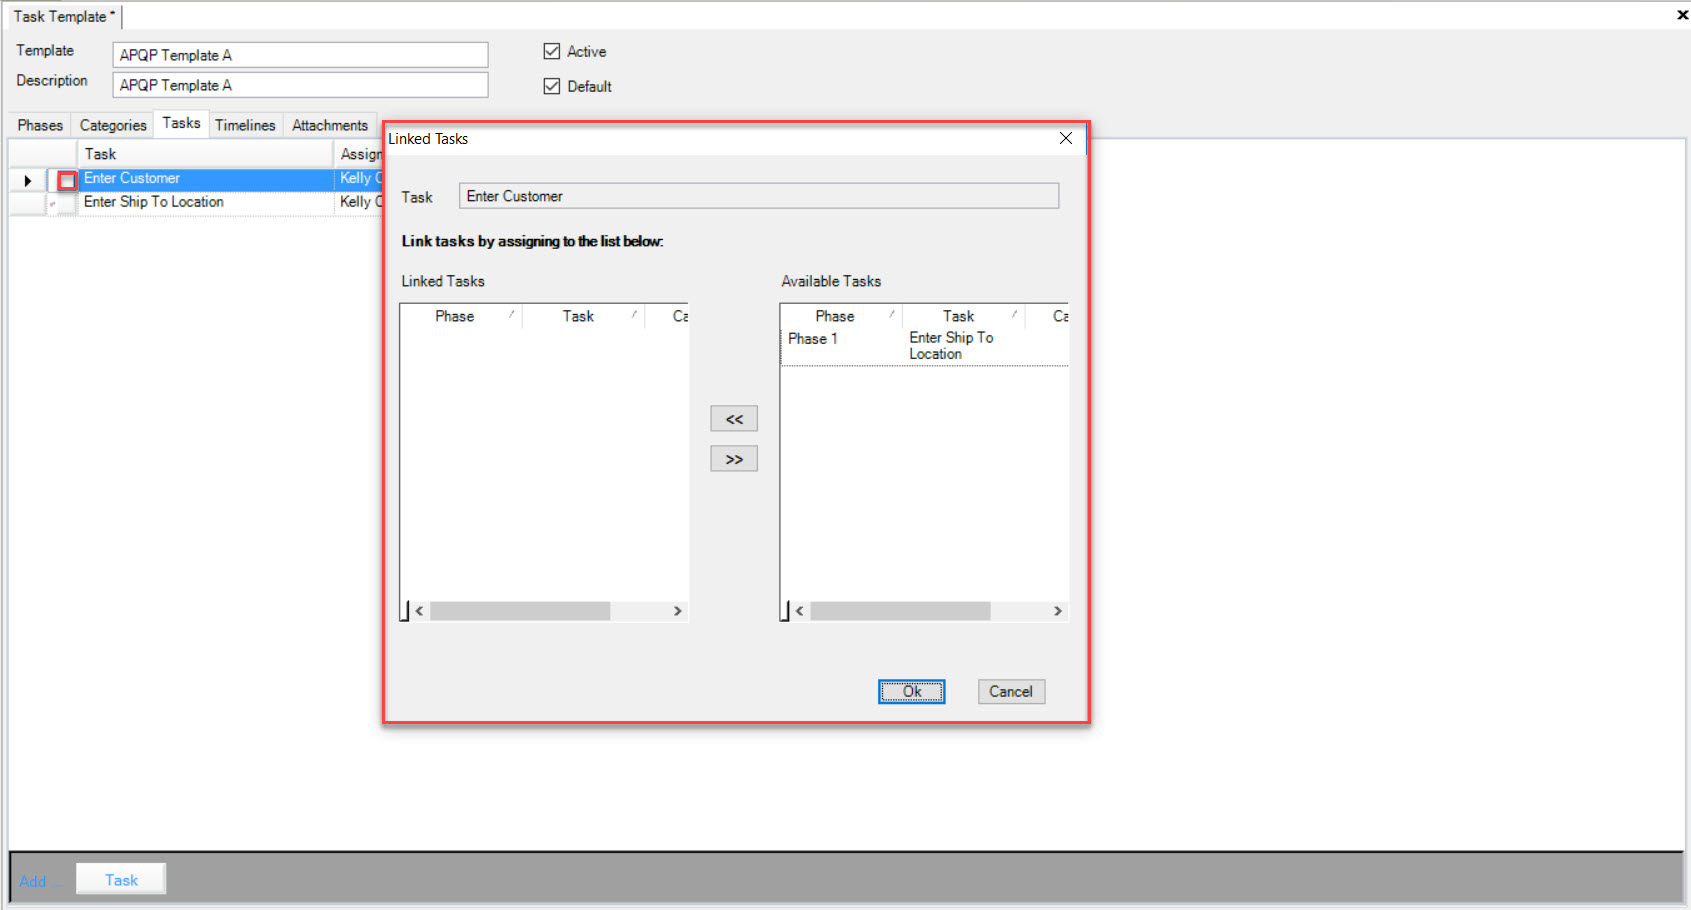
The Task you have selected will show in the Task text box in the Linked Tasks window. The Available Tasks will be available to highlight. After the selected Available Task(s) are highlighted, click on the  button.
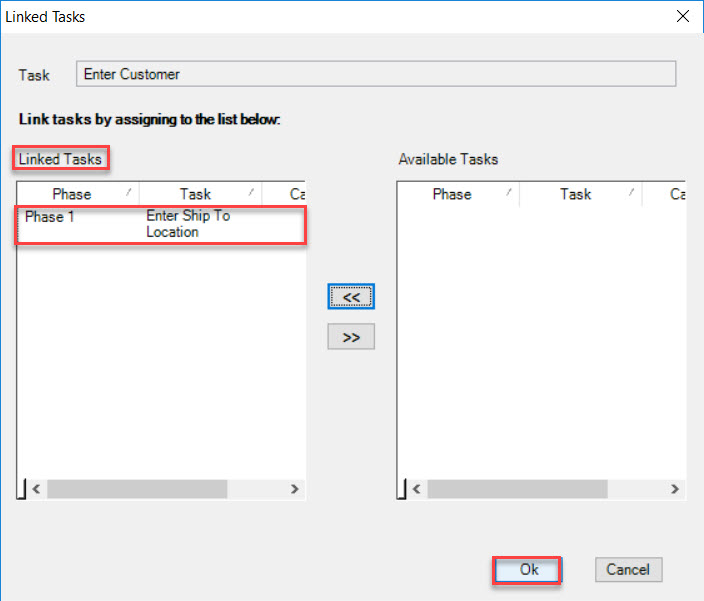
The selected Available Task will be in the Linked Tasks section of the Linked Tasks window; click Ok. Now users will be able to view that the two Tasks are linked together and therefore must be completed together.
Note
If you make any changes to a Task that is linked on a Planned Job, such as updating the task status or adding a note, the other Task(s) that are linked to it will automatically be changed as well.
Note
You also have the option to un-link Tasks by using the  button in the Linked Tasks window.
Make sure to save your changes before exiting.
Adding a New Timeline
Timelines are used to track progress. When launching a Planned Job, the user will be able to complete the start and end date of the Timeline, as well as enter and maintain the actual percentage complete of the Timeline. The system will calculate the expected percentage complete based on a start and end date entered, and update the Status of the Timeline.
To add a new Timeline to a Task Template, navigate to the  tab and click on the
  icon.
The Task Template screen will be displayed.

Locate and double-click on the Task Template you wish to add a new Timeline to. The Task Template Detail screen will be displayed. Make sure to click on the Timelines tab.
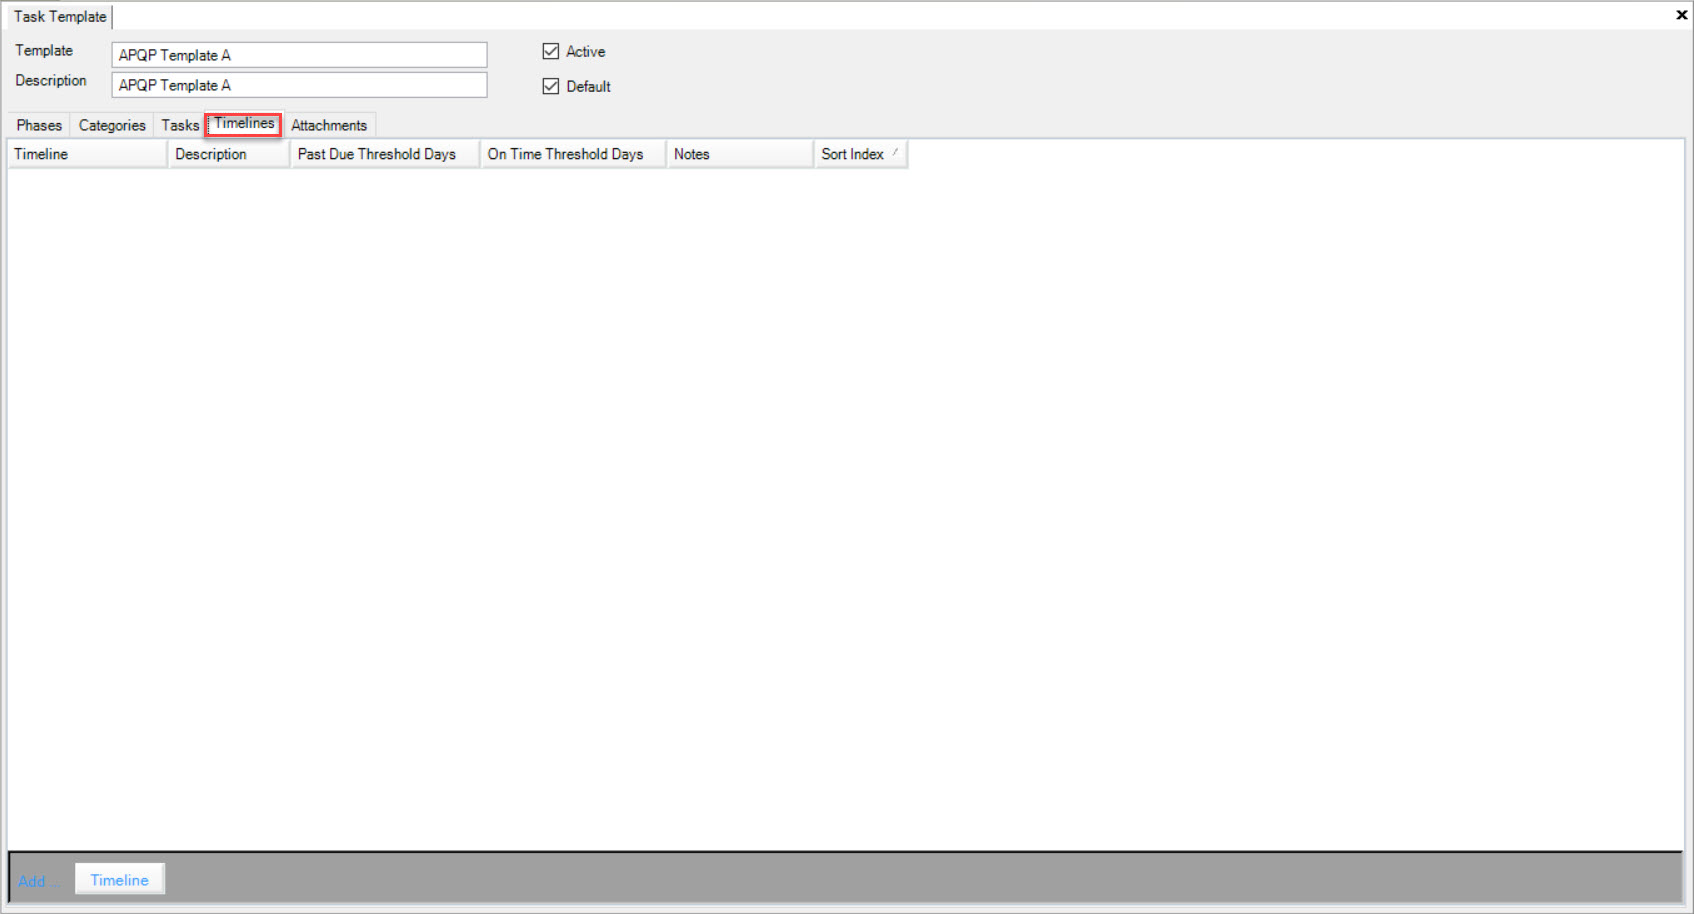
Located at the bottom of the screen, click on the  button.
A new row will appear; fill in the necessary fields such as Name of Timeline, Description, Past Due Threshold Days, On Time Threshold Days, and Notes.
Note
Past Due Threshold Days refers to the amount of days after the initial due date that the Timeline can be late. On Time Threshold Days refers to the number of days a user can override the Status of a Timeline to On Time, even if a Timeline is considered overdue based on the due date.
Make sure to save before exiting the screen.
Deleting a Timeline
To delete a Timeline from a Task Template, navigate to the  tab and click on the
  icon.
The Task Template screen will be displayed.

Locate and double-click on the Task Template you wish to delete a Timeline. The Task Template Detail screen will be displayed. Make sure to click on the Timelines tab.

Once you have found the specific Timeline you wish to delete, highlight the appropriate row. Use your Delete key and when the system prompts you, select Yes.
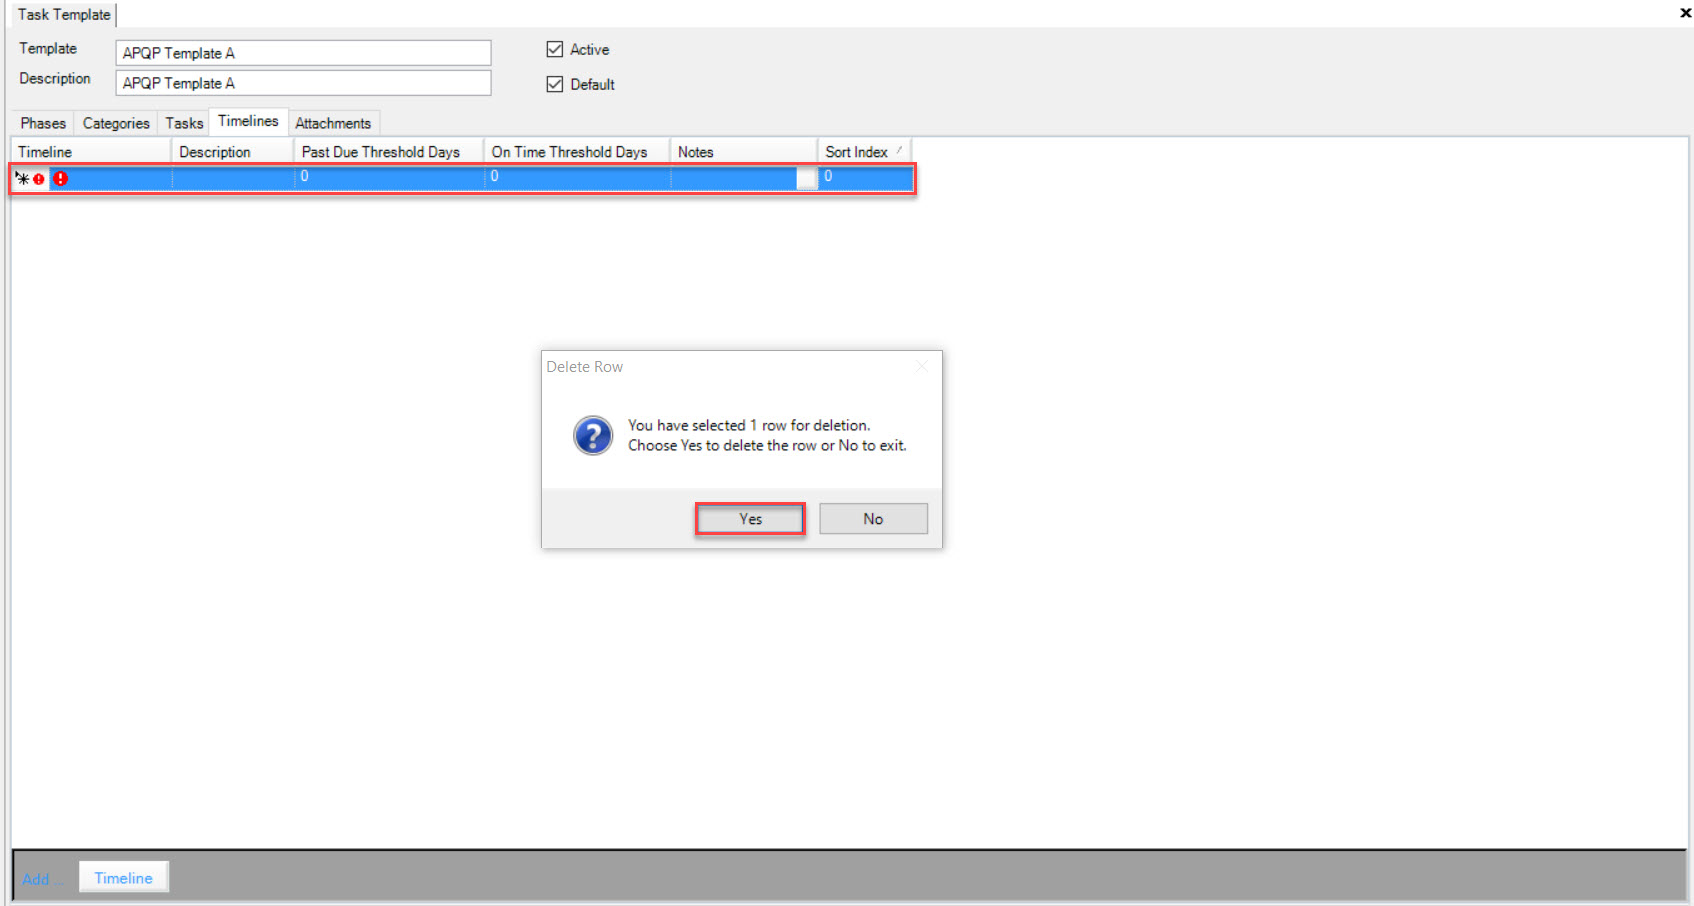
The highlighted row will be deleted immediately. Make sure to save your changes before exiting the screen.
Adding an Attachment
Adding an Attachment to a Task Template will give users the option to add a true Attachment once in the Planned Job screen.
To add an Attachment to a Task Template, navigate to the  tab and click on the
  icon.
The Task Template screen will be displayed.

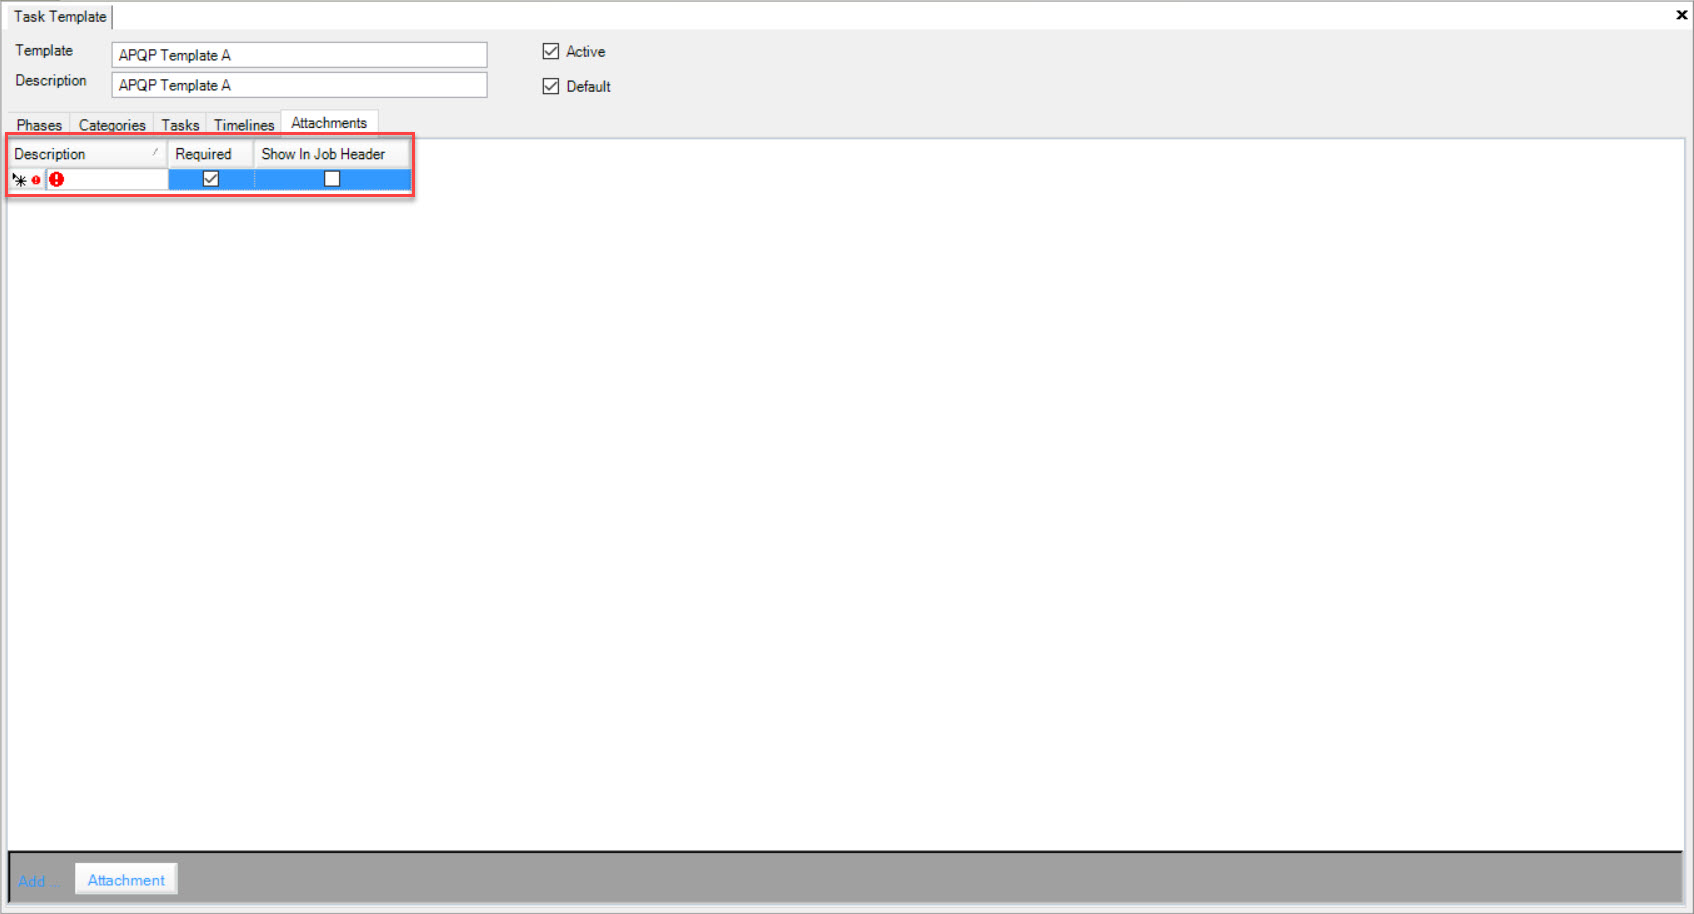
Locate and double-click on the Task Template you wish to add a new Attachment to. The Task Template Detail screen will be displayed. Make sure to click on the Attachments tab.
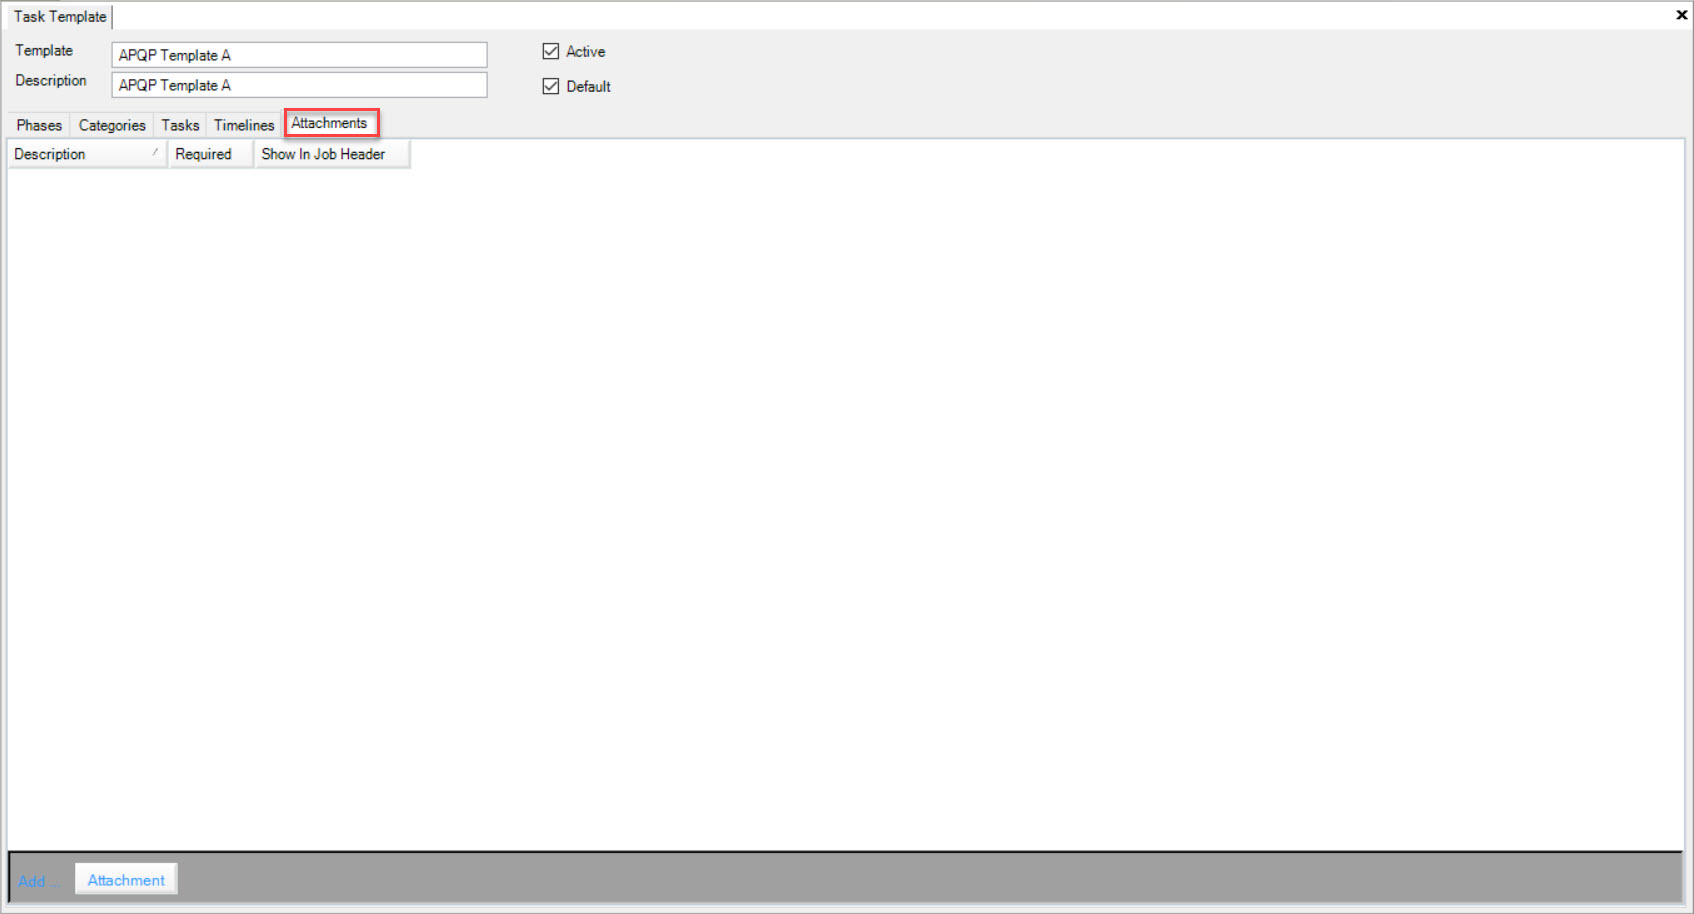
Click on the  button located at the bottom of the screen.
A new row will appear where you can fill in the Attachment Description, and select or de-select Required and Show In Job Header. Make sure to save your changes.
Note
In order to view the Attachments in the new Planned Job screen, users must select the Default option otherwise the Attachments will not show.
Note
Make sure to save your changes before navigating to the new Planned Job screen.
Selecting Required, the Attachment will become flagged in the new Planned Job screen. Navigate to the  button and click on the Planned Job option.
Located at the bottom of the screen, making sure the Job Attachments tab is chosen, you will be able to view the flagged Attachments. This means that the user must add the true Attachment
before proceeding/saving the new job.
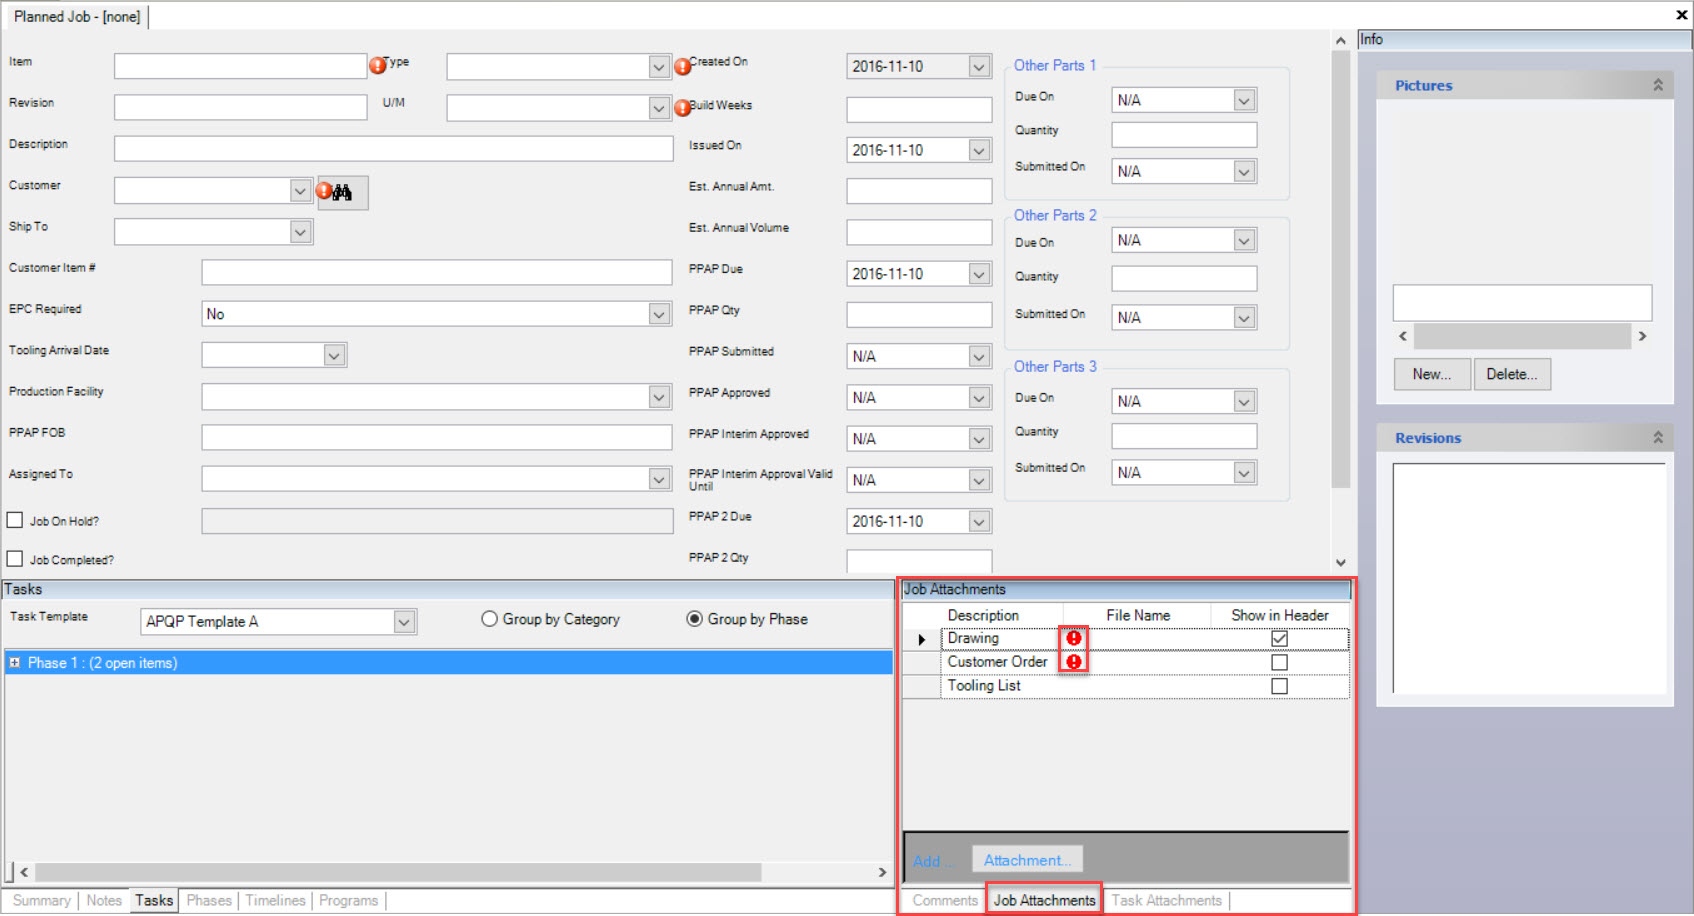
To add an Attachment where it is flagged, click on the box under File Name to select a true Attachment from your computer.
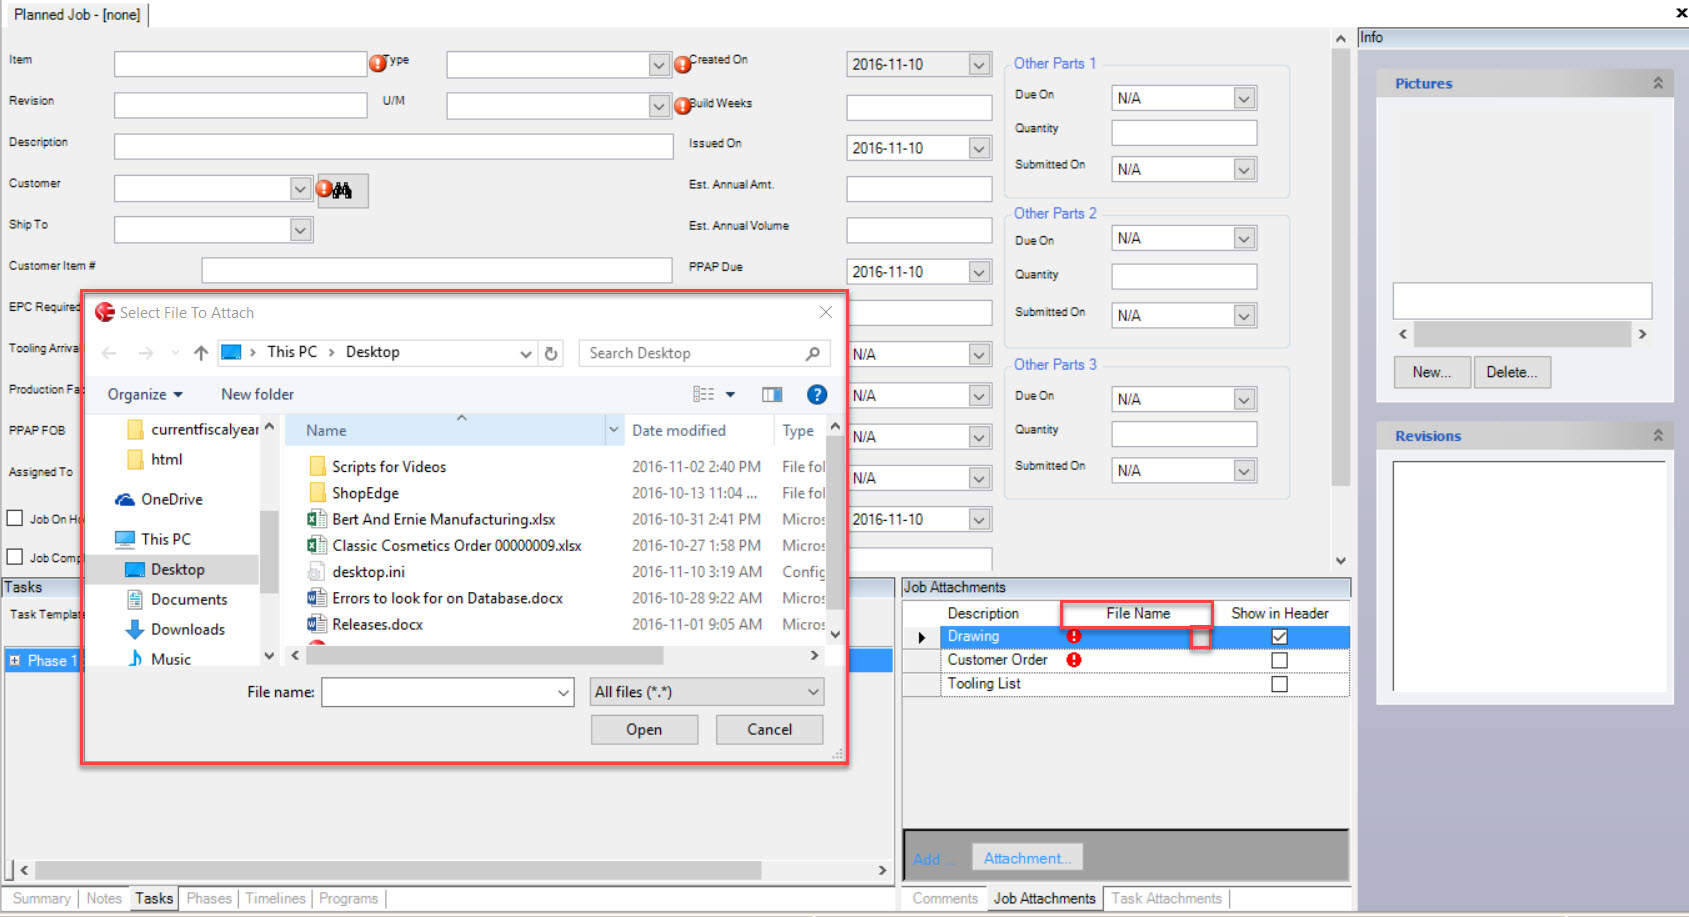
Once you have chosen the Attachment, click the Open button which allows you to view that the true Attachment has been added under the File Name. Make sure to save your changes before exiting. Navigate back to the Task Template screen.
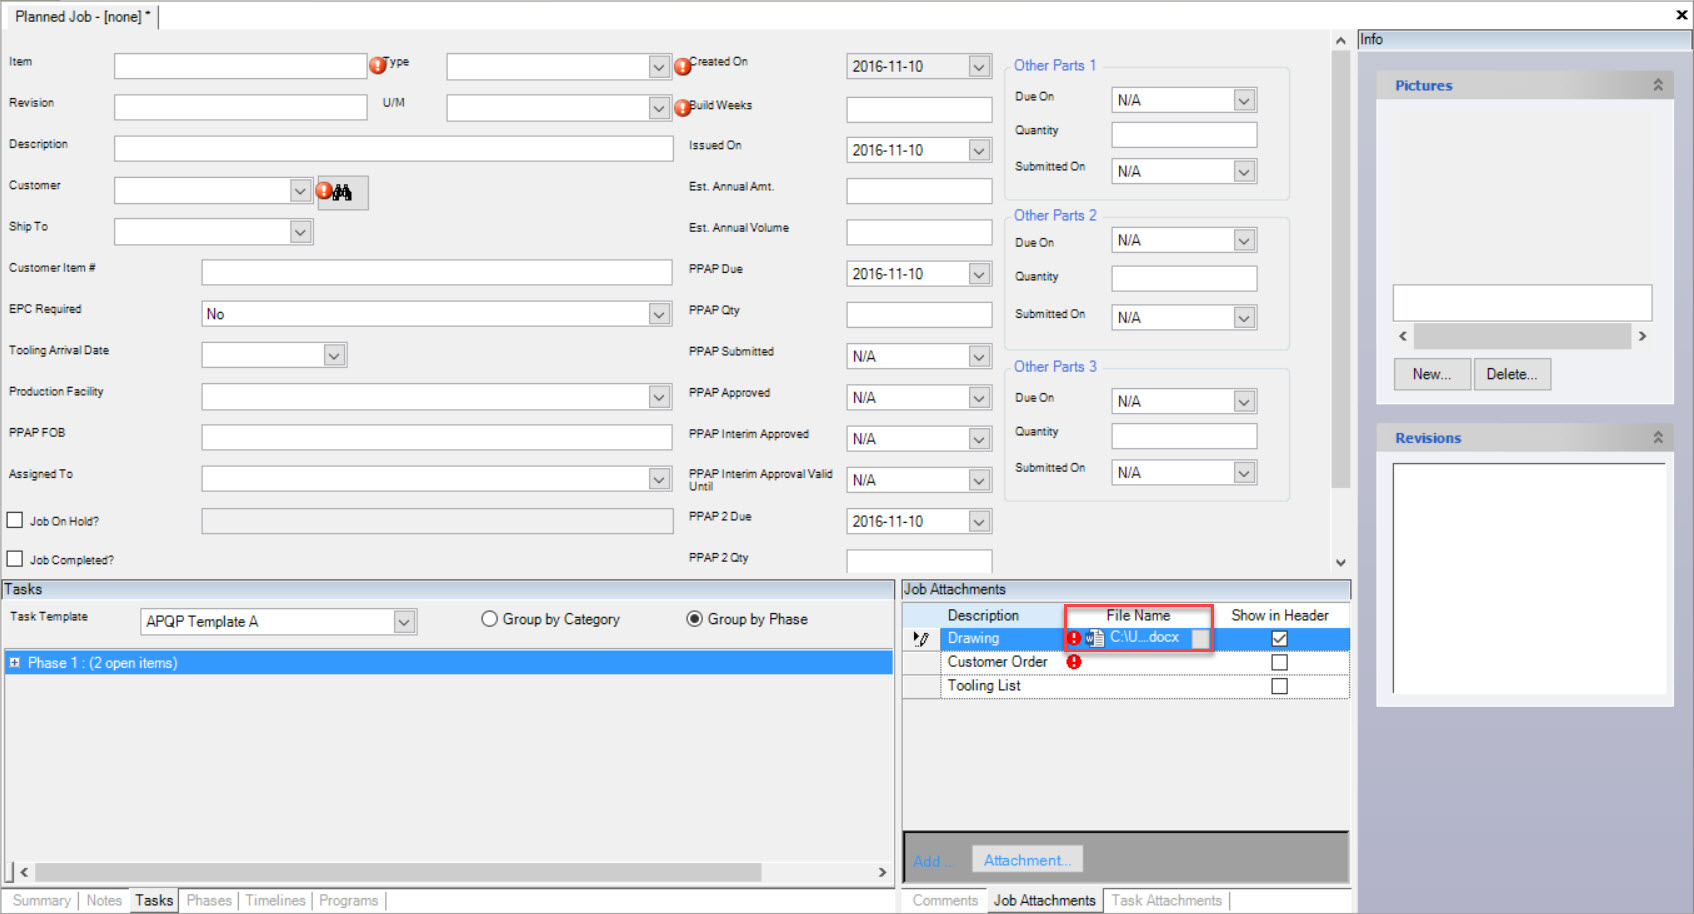
Select Show in Job Header for the same added attachment. Make sure to save your changes.
Selecting Show in Job Header will allow the user to add a true Attachment to the new Planned Job header. Navigate to the  button and click
on the Planned Job option.
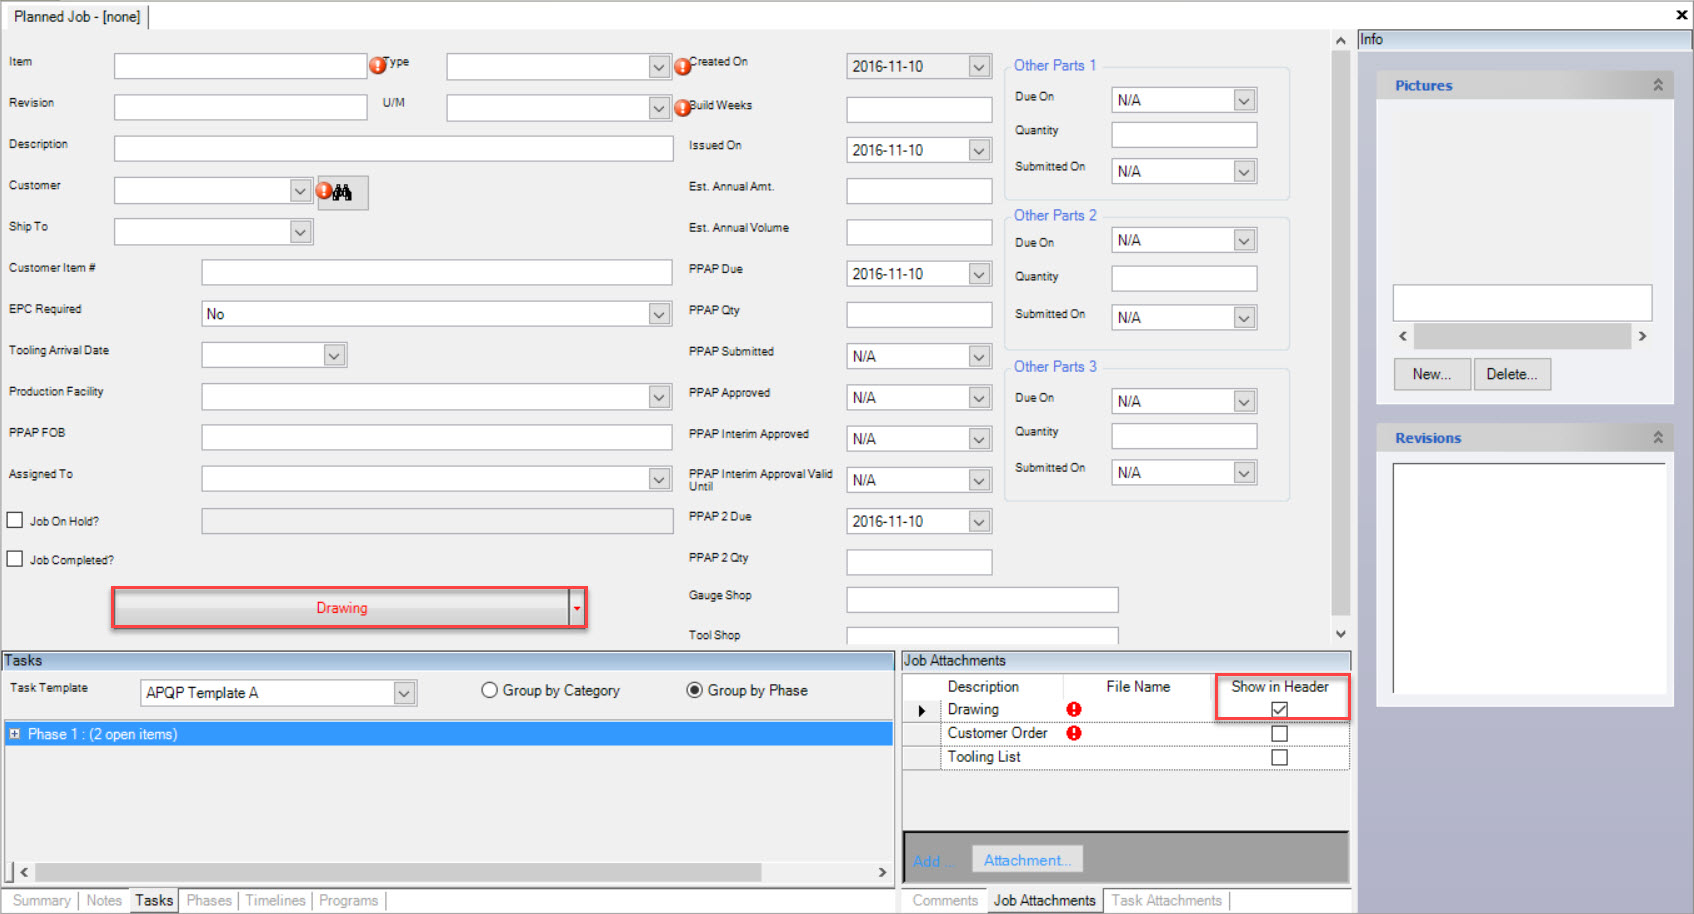
Navigate to the  button and click on the Planned Job option.
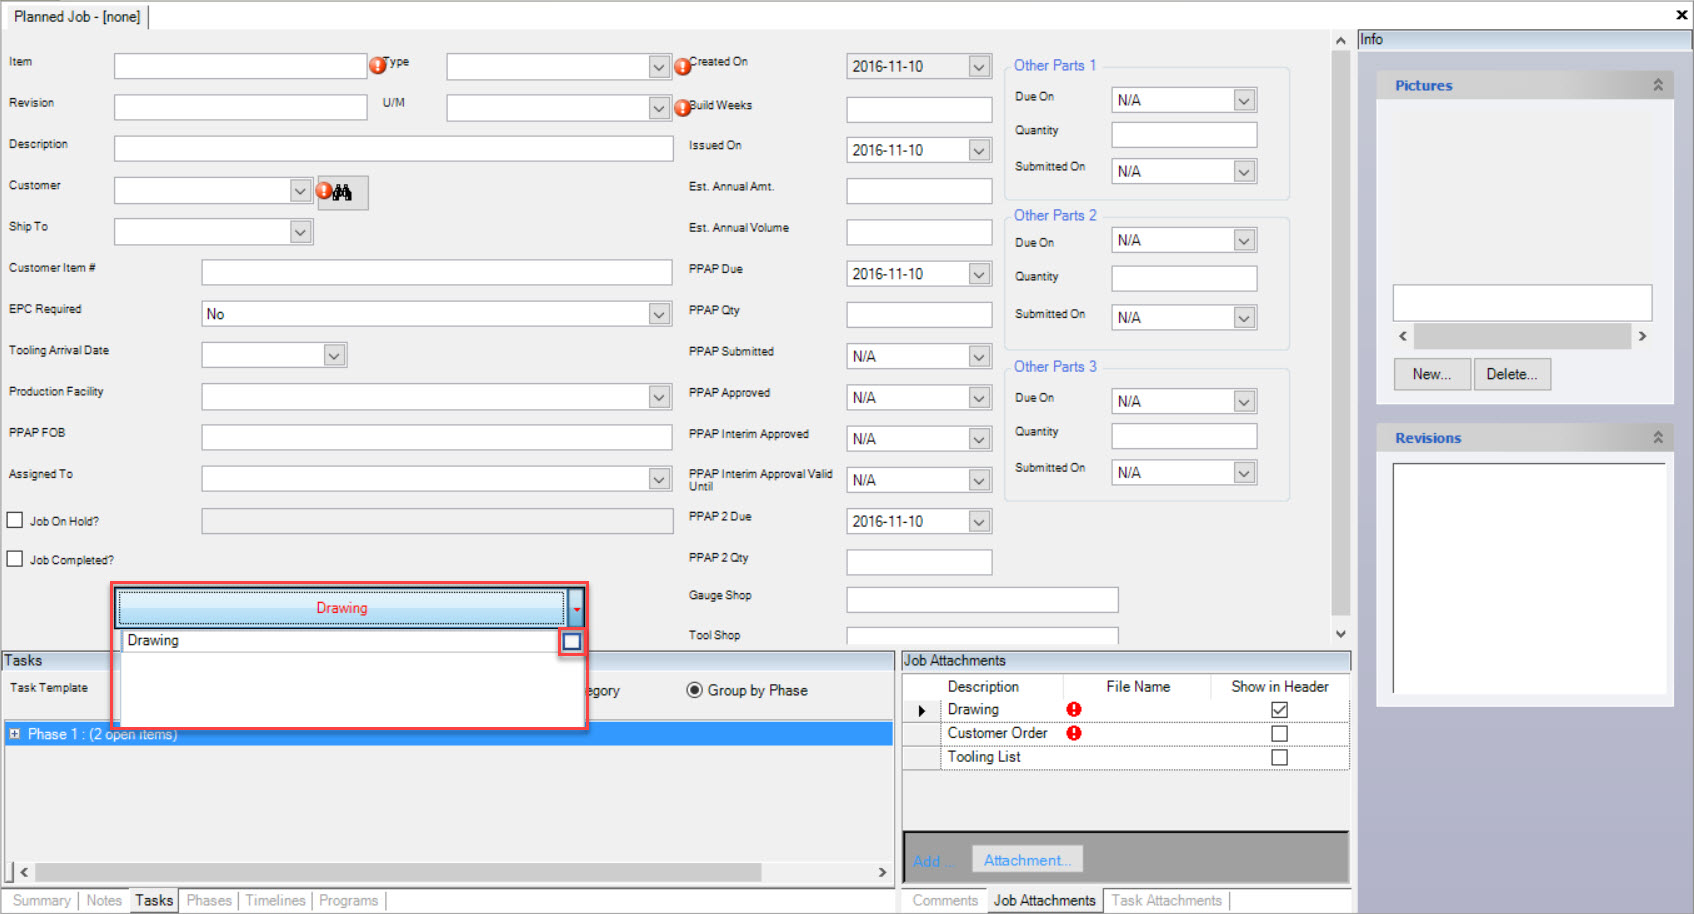
On the new Planned Job header, select the drop-down menu and click the square box. This will allow the user to choose an Attachment from their computer. Click Open when you have selected one.
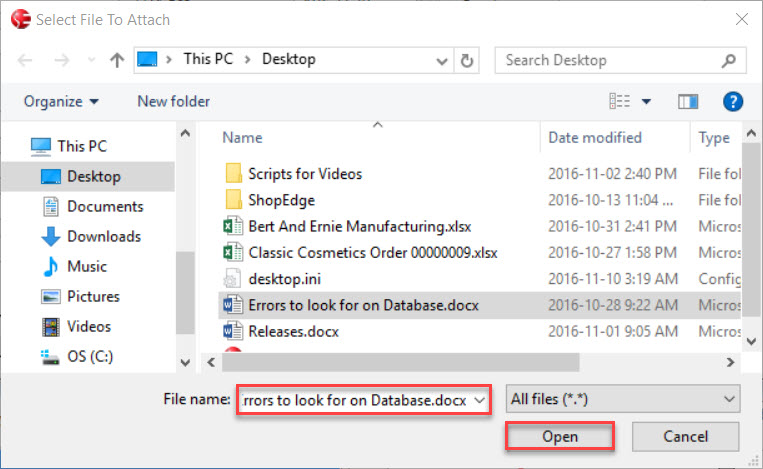
Once you click Open, the added Attachment can be viewed under Job Attachments.
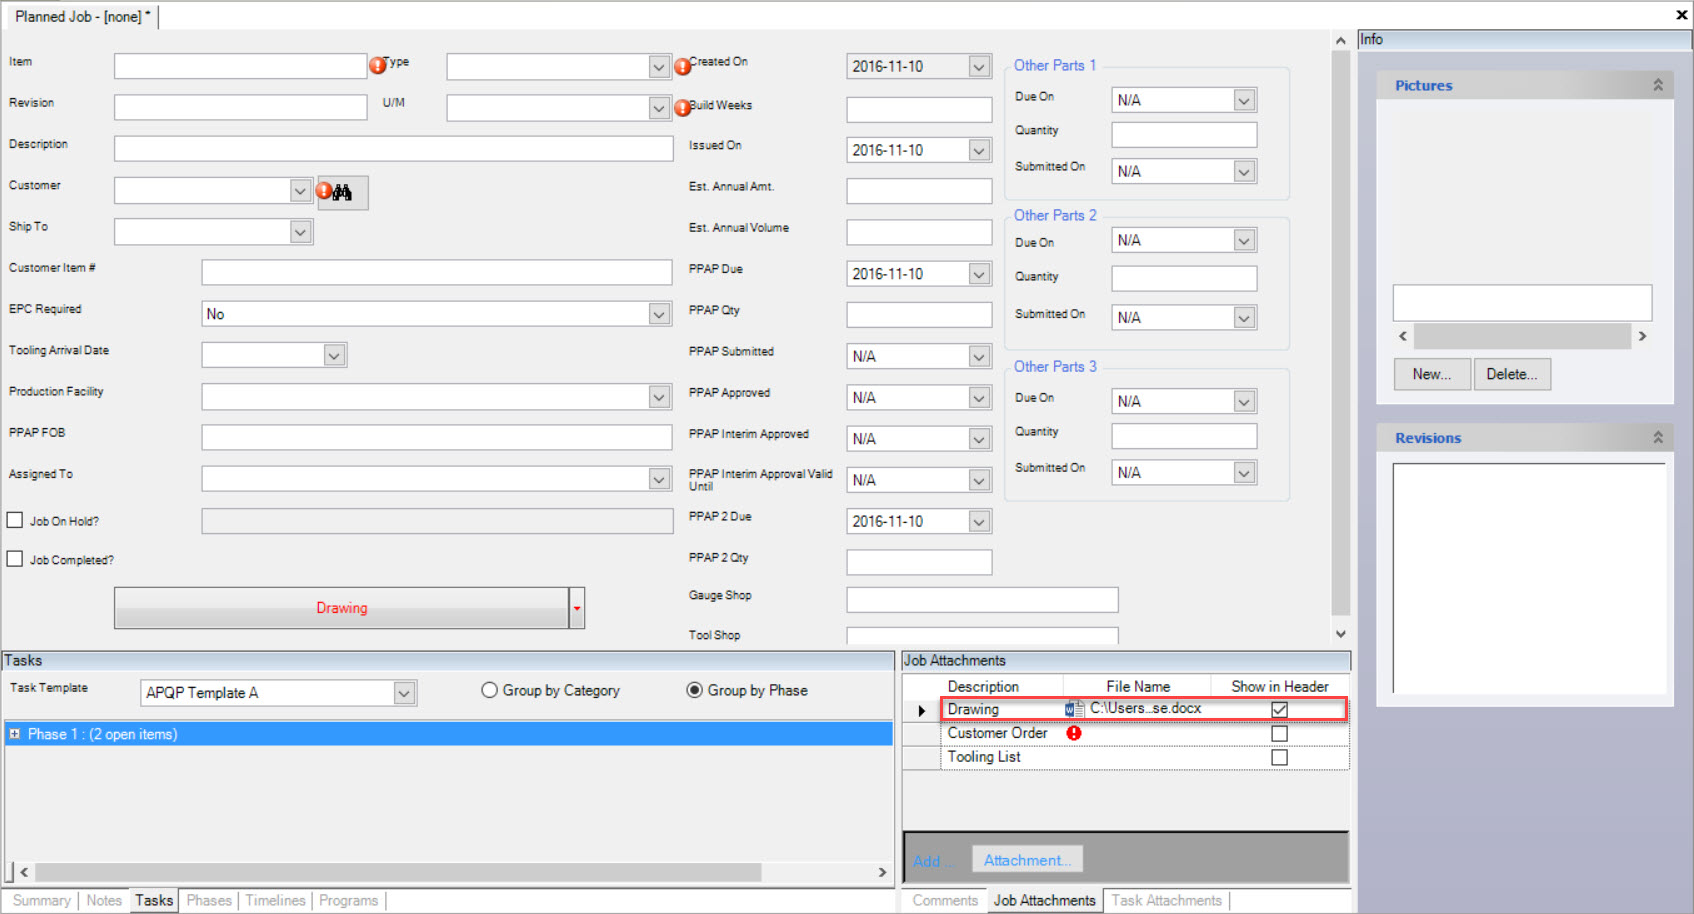
Make sure to save your changes before navigating back to the Task Templates screen.
Users can de-select Required and Show in Job Header in Task Templates which allows users to add a true Attachment or not in the new Planned Job screen.
Fill in the rest of the necessary fields for the Planned Job.
Make sure to save your changes before navigating back to the Task Templates screen.
If both options are de-selected, save your changes. Navigate to the  button and select the Planned Job option.
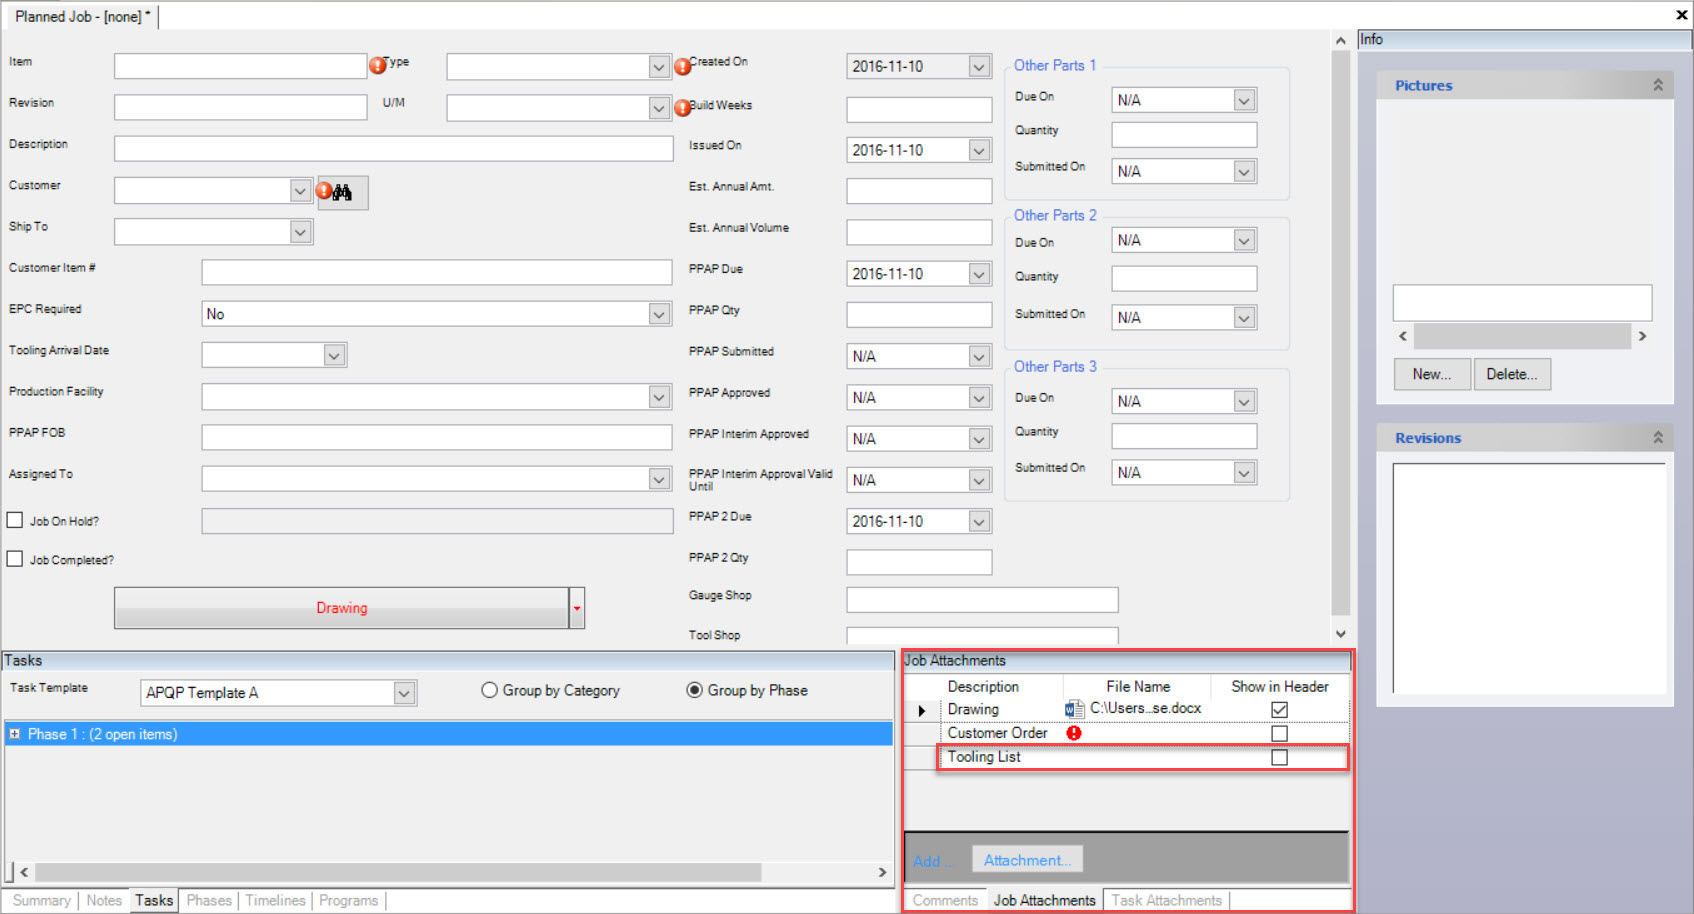
As you can see, adding a true Attachment is neither Required nor Shows in the Job Header but is still available for the user to add an Attachment if they wish to do so.
Make sure to save your changes before exiting the screen.
Deleting an Attachment
To delete an Attachment from a Task Template, navigate to the  tab and click on the
  icon.
The Task Template screen will be displayed.

Locate and double-click on the Task Template you wish to delete an Attachment from. The Task Template Detail screen will be displayed. Make sure to click on the Attachments tab.

Once you have found the specific Attachment you wish to delete, highlight the appropriate row. Make sure to de-select both Required and Show in Job Header. Use your Delete key and when the system prompts you, select Yes.
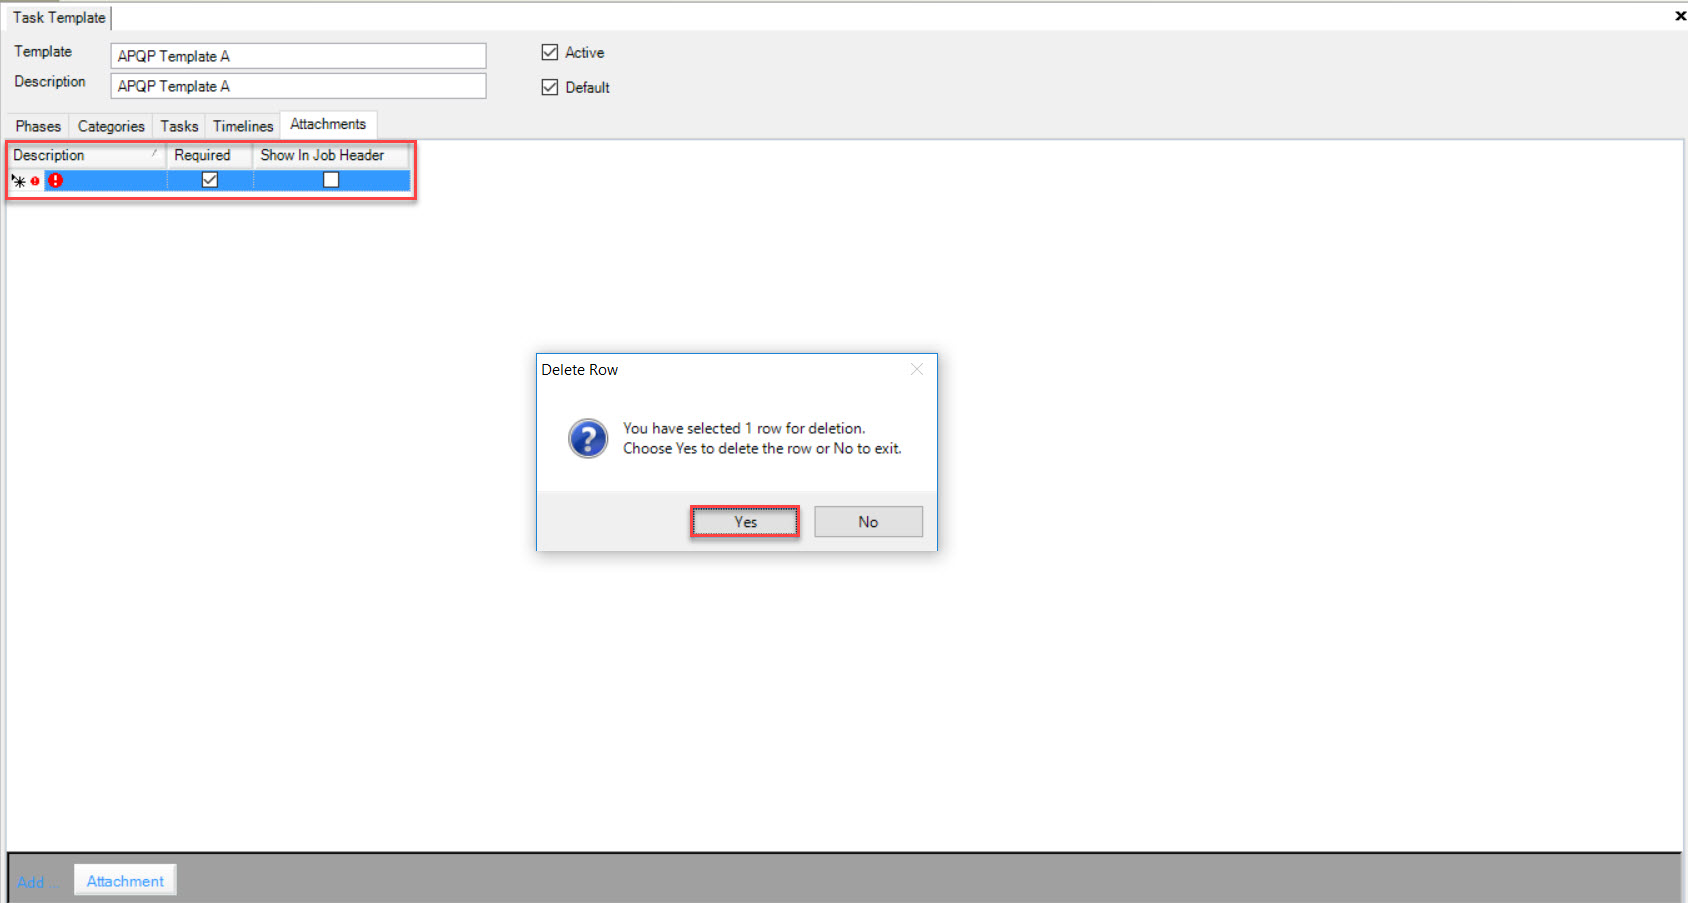
The highlighted row will be deleted. Make sure to save your changes before exiting the screen.